 Roofing work is not an easy task; when performing them, you need to be extremely careful and adhere to the recommended work technology. Consider how to properly install metal tiles.
- General information about the material
- Installation stages
- Calculation of the amount of materials
- Checking the correct shape of the roof
- Installing the cornice board
- Laying waterproofing
- Construction of the crate
- Installation of the cornice strip
- Installation of internal aprons and internal valleys
- Laying sheets of metal
- We stack the sheets in one row from right to left
- Lay sheets in several rows
- We lay sheets on triangular slopes
- Final stage
- Mistakes that beginner roofers often make
- Other ways to use metal tiles
- conclusions
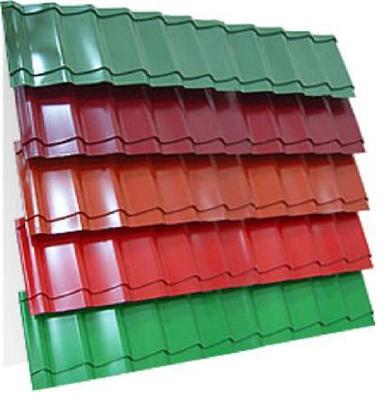
General information about the material
Metal tile is very practical roofing material, made of sheet steel (sheet thickness, depending on the type of metal tile, 0.4-0.6 mm).
To protect steel from corrosion, galvanizing and coating with a layer of polymeric material are used. The polymer not only protects the steel from rust, but also gives the coating color.
The metal tile has a number of positive qualities, among them:
- Coating durability;
- Attractiveness of appearance;
- Simple installation technology;
- Light weight material.
Due to these qualities, many developers choose metal tiles for roofing.
Installation stages

How is metal roofing installed? Here are the main stages of the process:
- Calculation of the amount of material required for the installation of the roof;
- Checking the horizontalness of the roof ridge and the flatness of the slopes;
- Installation of a cornice strip for mounting hooks for attaching a gutter and installation of roof overhangs;
- Laying waterproofing;
- Construction of the lathing with the installation of reinforcing strips in the valleys, around the pipes and skylights, in the places where accessories are attached - snow retainers, roof ladders, etc.;
- Installation of a cornice strip;
- Installation of lower valleys and internal aprons around pipes;
- Laying sheets of metal;
- The testamentary stage, including the installation of end strips, upper valleys, junction strips, installation of accessories provided for by the project, installation of a lightning rod.
Calculation of the amount of materials
As a rule, installation of metal tiles begins with calculations that allow you to calculate the amount of material required.
To do this, you will have to measure the roof, you can do it yourself or invite a measurer for this.
Having found out the length and height of the slope and knowing the dimensions of the metal tile sheet (dimensions may differ for different manufacturers), it is easy to calculate how many sheets will be required to cover the roof.
In this case, it is necessary to take into account the length of the overhangs (usually 50 mm) and the fact that the sheets of material are laid with an overlap (the overlap of the metal tile during installation is 150 mm).
Also, you will need to calculate the amount of waterproofing material. To do this, you need to know the area of \u200b\u200bthe roof and the amount of waterproofing in the roll, given that part of the material will go to overlaps.
To calculate, you need to divide the total area of \u200b\u200bthe roof by the area that can be covered using one roll. Round up the resulting figure
To calculate the number of additional elements, you need to add the lengths of those slopes where they will be installed and divide this value by 1.9 (2 meters is the standard length of the bar, 10 cm is left for overlapping.)
When calculating the amount self-tapping screws for metal tiles, takes into account that eight pieces are used for each square meter of coverage, 8 pieces are required for each running meter of planks.
Checking the correct shape of the roof
As a rule, pitched roofs are covered with metal tiles - two-, four-pitched or hip. If a metal tile is chosen as a coating, the minimum slope of the roof must be at least 14 degrees.
For flat roofs, this roofing material is not suitable. The maximum slope is usually not limited.
However, it should be remembered that these recommendations are general, that is, they do not take into account the climatic features of a particular region.
So, for example, in the northern regions of the country, where a lot of snow falls, the slope of the metal tile should be at least 30, and ideally - 40-50 degrees.
In those areas where there is little snow, but there are often strong winds, it is undesirable to make a roof with excessively steep slopes.
Under such climatic conditions, metal tiles can also be used to cover the roof - the slope, in this case, is best done within 15-20 degrees.
Before starting installation, it is necessary to check the horizontalness of the ridge and the correct shape of the slopes. To do this, it is enough to measure the slopes diagonally. If distortions are detected, then it is necessary to use additional elements to correct the situation.
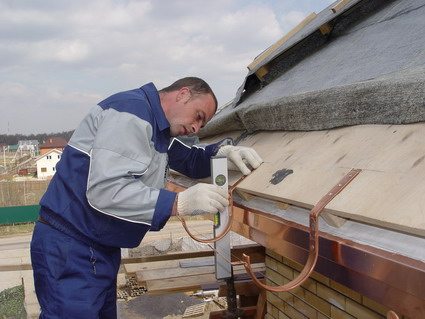
Installing the cornice board
The cornice board is mounted in grooves that are cut in the rafters, this element is necessary to add rigidity to the entire structure.
Grooves are cut into the cornice board, which will be used to install the gutter hooks. Long hooks must be installed before the installation of metal tiles begins.
Laying waterproofing
For waterproofing, modern membrane materials are used. Bituminous materials, such as roofing material, are not allowed to be used under metal tiles.
Waterproofing materials are rolled out in the direction from the bottom of the roof to the ridge.
When joining two panels, the overlap is 150 mm.It is convenient to fasten the panels with the help of a construction stapler, they need to be laid with a slight sag, the joints are glued with adhesive tape.
Construction of the crate
We continue to work with roofing material metal tiles - the installation of sheets is carried out by laying on a crate assembled from boards with a section of 30 × 50 mm.
The initial purlin, located at the very bottom, should be somewhat thicker (by 15-20 mm), since it is used to maintain overhangs.
The first crate is carefully aligned with the eaves. The distance between the first and second board of the crate is 280 mm, subsequent boards are fixed at a distance of 350 mm from each other.
That is, the step of the metal tile must correspond to the step of the crate.
During the construction of the lathing at the locations of the valleys, the installation of various roofing elements and the organization of the exit of pipes, it is necessary to mount additional reinforcing strips.
Installation of the cornice strip
Now you need to install the eaves bar, that is, it is first installed - the metal tile is fastened already in the following stages. The bar is fixed with galvanized self-tapping screws, the screw pitch is 300 mm.
Advice! The bar should be set tight to prevent rattling in the wind. The overlap at the joints should be from 50 to 100 mm
Installation of internal aprons and internal valleys

For the design of valleys and the installation of internal aprons, ready-made roofing parts are used. . Valleys are installed in the inner corners, arranging a continuous crate under them and additional waterproofing.
Advice! Between the lower valley and the metal tile I lay a porous sealant, which has the property of self-expansion.
For the device of internal aprons, adjoining strips should be used, which are made of a sheet of metal of the same color as the roofing material. If the chimney is round, then it is necessary to use special passage elements to lead through the roofing.
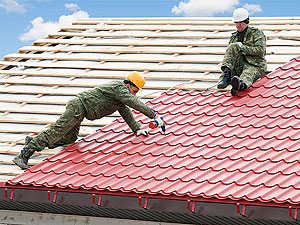
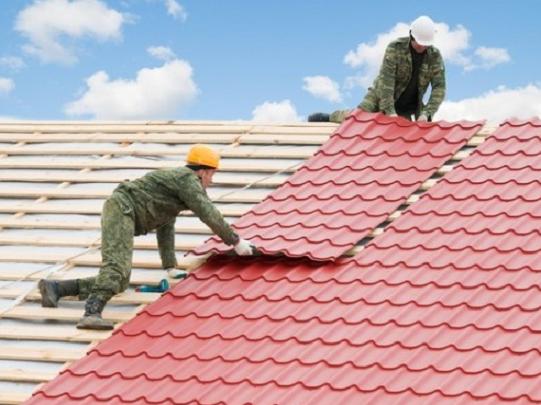
Laying sheets of metal
Before proceeding with the installation of the sheets, it is necessary to assemble the logs along which the sheets of materials will rise to the roof.
Advice! If there is a protective film on the sheets of metal tiles, then it must be removed immediately after installation.
Laying sheets can be carried out both to the left of the first sheet and to the right. Only in the first case, each subsequent sheet covers the last wave from above, and in the second, to form an overlap, each subsequent sheet is slipped under the previous one.
With any form of slopes, sheets of metal are aligned horizontally along the eaves. Consider how to properly mount metal tiles with different laying methods.
We stack the sheets in one row from right to left
- The first sheet is laid on the slope and aligned with the eaves and end.
- The first sheet is temporarily strengthened with one self-tapping screw at the ridge (the screw is screwed in the center of the sheet).
- The second sheet is laid side by side (150 mm overlap). The second sheet is aligned along the eaves and fastened with self-tapping screws to the first;
- One or two more sheets are also laid, fastening them together.
- Align the block obtained from the fastened sheets with respect to the cornice and attach the sheets to the crate, except for the last one, which is used to create the next block.
Lay sheets in several rows
- The first sheet is laid with alignment along the end and eaves;
- Then the second sheet is laid, above the first. The second sheet is strengthened with one self-tapping screw at the ridge, placing the screw in the center of the sheet. The first and second sheets are connected with screws.
- The third sheet is located next to the first, and the fourth - above the third.
- The finished block of four sheets is aligned and screwed to the crate.
We lay sheets on triangular slopes
- On a triangular slope, you need to find the center, and draw a line along it.
- Draw a similar line in the center of the first sheet.
- Lay the first sheet, aligning the axes, securing it to the ridge with one screw.
- Further do-it-yourself metal tile installation continues according to the principle described above to the right and left of the first sheet.
- When installing a metal tile on a triangular slope, you will have to trim the sheets, for this you need to make a special tool, which the roofers call the "devil".
- Chertok can be made from boards 100 mm wide, from which a rectangle is assembled on hinged fasteners, while the distance between the outer side of the right board and the inner side of the left should be 1100 mm, that is, correspond to the working width of the metal tile sheet.
- With the help of the tool made, you can mark sheets of metal tiles directly on the roof.
Final stage
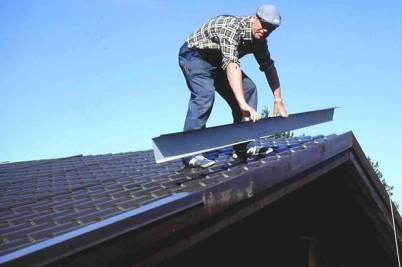
After laying the sheets of metal tiles, it is necessary to install ridge and end strips, install external valleys, external aprons and other necessary accessories.
A prerequisite is the installation of accessories such as snow retainers, which are used to prevent ice blocks from descending into the roofs and help preserve the roofing material.
It is also necessary to install a roof ladder, which will be used for revision of the roof and minor repairs.
Mistakes that beginner roofers often make
Consider common mistakes in the installation of metal tiles, which can reduce the quality characteristics of the coating:
- It is strictly forbidden to cut sheets with a grinder, as this leads to a violation of the protective coating and a quick failure of the roof.
- Do not use self-tapping screws without sealing rubber washers for fastening sheets. The use of unsuitable fasteners can significantly reduce the life of the coating.
- Installers must know how to walk on metal tiles so as not to damage the coating. First, you need to use shoes with soft and non-slip soles. Secondly, you can only step into the deflection of the wave and the location of the crate.
- It is only necessary to screw in the screws for fastening to the crate into the deflection of the wave. If this rule is not followed, it is impossible to achieve reliable fastening.
- During the construction of the crate, it is necessary to take into account such an indicator as the wave step of the metal tile. It should correspond to the distance between the boards of the crate.
- Do not forget to remove the protective film from the metal tile. After a while, it will “stick” and it will be much more difficult to do it carefully.
Other ways to use metal tiles
Metal roofing material can be used to build fences.It should be noted that a fence made of metal tiles or a cheaper version of roofing material - corrugated board - is very convenient and beautiful.
What are the benefits of this fencing option?
- Easy installation;
- Attractive appearance;
- The ability to hide the fenced area from prying eyes;
- Durability;
- Unpretentiousness in care;
It should be noted that a metal tile for a fence can only be used on the condition that a high-quality foundation is built under the fence, otherwise the fence will not be able to withstand the force of the wind.
And this circumstance, perhaps, is the only drawback of this type of fencing.
conclusions
Thus, the installation of metal tiles is not difficult, however, the work requires a good knowledge of technology and the availability of practical skills in working with construction tools.
Mistakes made during installation can cause the coating to lose its visual appeal and begin to leak during the first year of operation. Therefore, it is important to take the roofing work very seriously.
Did the article help you?