
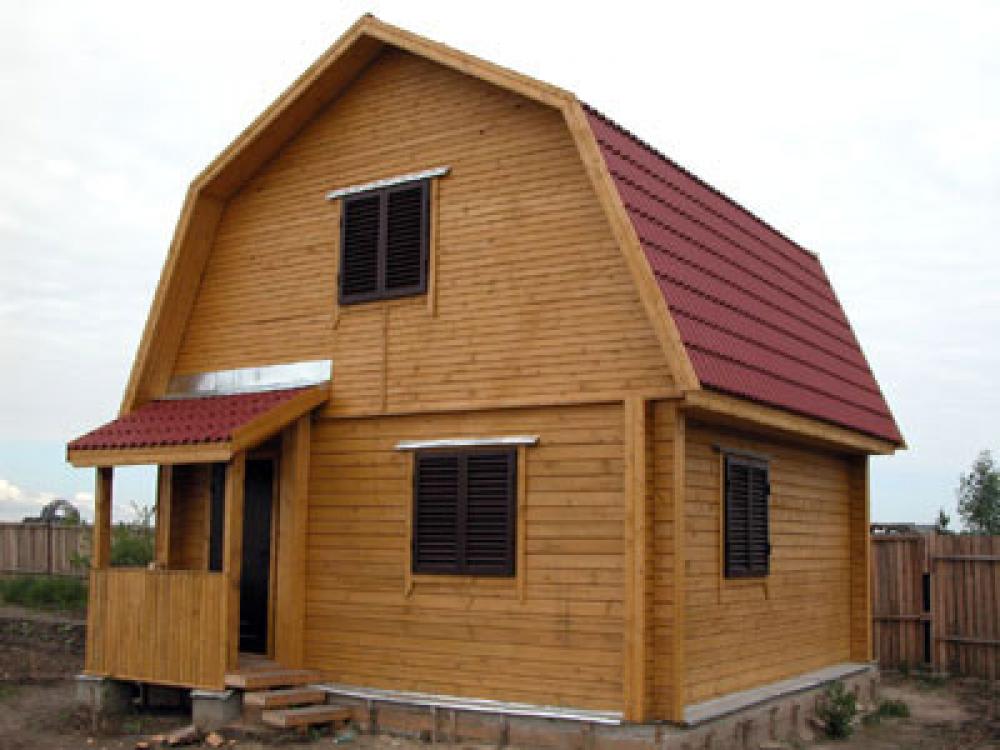
How to build a roof yourself? Let's figure it out! I will give a simple step-by-step instruction for assembling a gable roof, developed from personal installation experience at many sites. You will learn how to install a mauerlat, a bed, a gable, rafters, as well as how to install roofing materials.
- What you need to know about a gable roof
- Mandatory elements in the construction of gable roofs
- What to consider when calculating the roof
- Construction of a roof on a house of aerated concrete blocks
- Step 1: prepare building materials
- Step 2: install the Mauerlat
- Step 3: install the bed
- Step 4: Lay the Gable
- Step 5: install racks and girders
- Step 6: Installing the rafters
- Step 7: Strengthening the rafters with puffs and braces
- Step 8: trimming (trimming) rafters
- Step 9: Installing the roofing pie
- Conclusion
What you need to know about a gable roof
There are 3 types of roofing systems in widespread use:
- lean-to,
- gable,
- four-slope.
| Illustration | Type |
 | Shed. Despite the ease of erection, it is not functional enough, and can not be mounted on every object.
|
 | Gable. Unlike a shed roof, a gable roof can be assembled on any building site. |
 | Four-slope. Unnecessarily complex, both in planning and construction. |
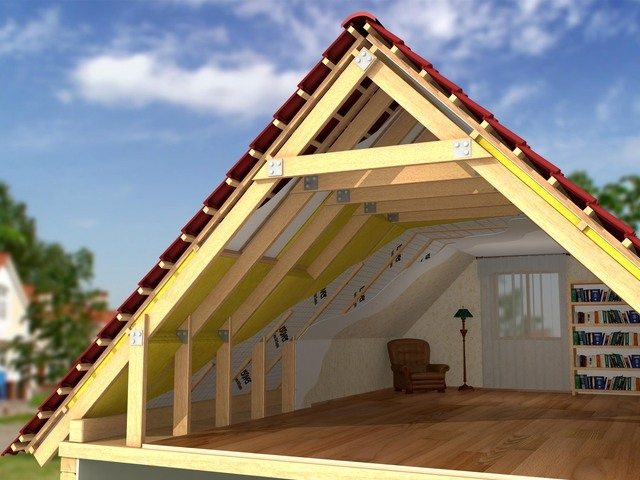
A distinctive characteristic of gable roofs is the rafters spaced at the same distance from each other. For stability, the rafters are interconnected by transverse elements of the crate.
In this design, an attic space is formed between the hanging or layered rafters, which can be used as an attic or as an additional utility room.
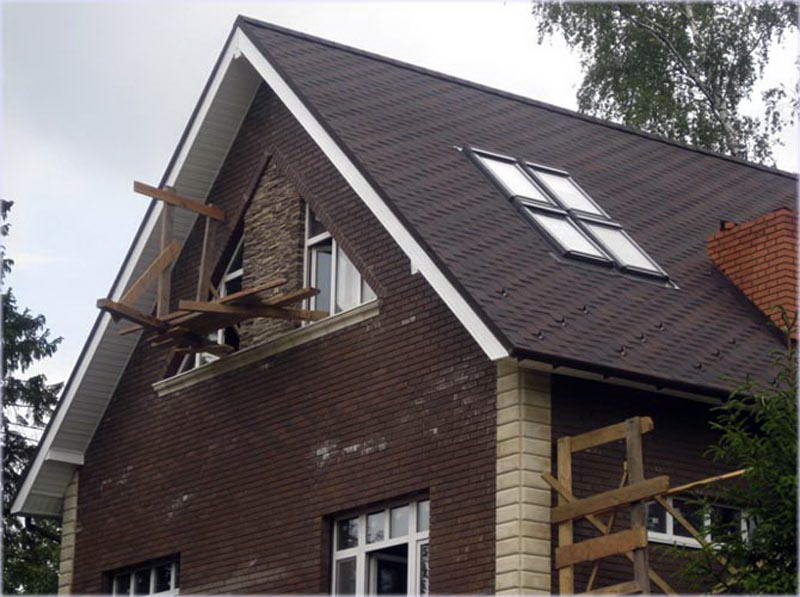
In front and behind the slopes are gables associated with the facade of the building. Gables are made deaf or equipped with glazing and ventilation.

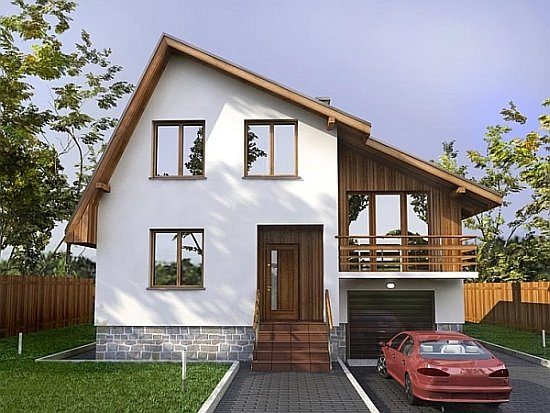
In accordance with the design features, gable roofs are divided into symmetrical, asymmetrical and broken.
| Illustration | Type |
 | symmetrical - traditional designs in which the rafters are arranged in the form of an isosceles triangle.
|
 | With different slope angles - non-traditional solutions that are used due to the complex architecture of the building. |
 | Gable (broken) - complex structures with a characteristic kink in the middle of each slope. |
Mandatory elements in the construction of gable roofs

The diagram shows commonly used options for roofing systems. They are all united by the fact that the mechanical load from the truss system is transferred to the Mauerlat and already through it to the load-bearing wall.
If the construction of a gable roof is carried out on small objects, such as a garage, a temporary house, a barn, etc., puffs can be installed not on the Mauerlat, but through the reinforcing belt - on the walls.
To make everything clear in the assembly instructions for the truss system, read the list of structural elements and their purpose.
| Illustration | Description |
 | Mauerlat. A bar rigidly fixed to the load-bearing walls, which serves as a support for the rafter legs. It takes on the weight of the truss system and transfers the load to the load-bearing walls. For the manufacture of Mauerlat, hardwood is used, which is not prone to cracking. |
 | Rafter legs. Diagonally located supports, which, together with the tightening, form truss trusses.
On the rafter legs, the installation of the entire roofing pie is carried out. |
 | Puff. A horizontal beam that connects the rafter legs at their bottom.
Through the ends of the tightening, the load is transferred to the Mauerlat and to the load-bearing walls. |
 | Rigel. Horizontal brace installed at the top of the roof truss.
This part fastens adjacent rafter legs and is used as an attic ceiling. |
 | Rack. A vertical beam that connects the run and the puff. To do this, the rack is fastened with one end exactly in the center of the tightening, and with the second - at the center of the run. |
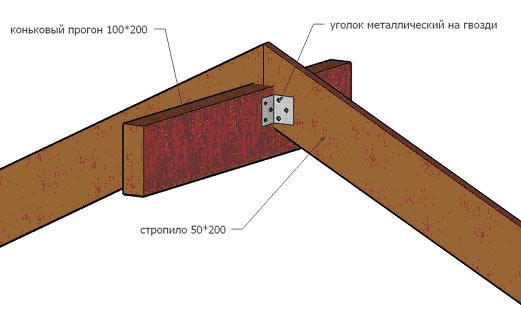 | Run. A horizontal beam that is attached below the ridge beam.
A run in the system is needed to connect the rafter legs in their upper part. |
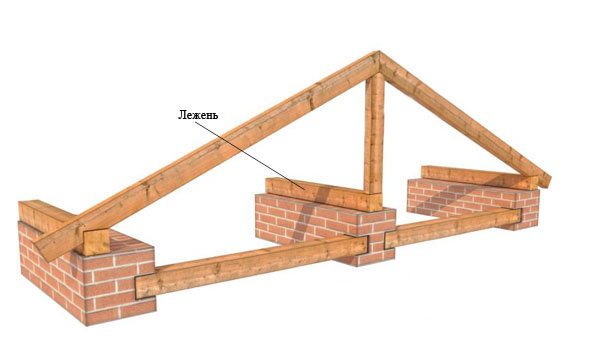 | Sill. A horizontal beam, installed in the same way as a run, but in the lower part of the truss system - on a puff.
Due to the lying position, the load from vertical struts and struts does not fall on the inner wall, but on the Mauerlat. |
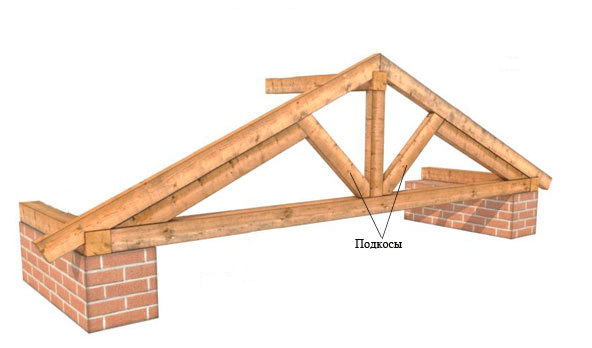 | Strut. A diagonal brace that connects the base of the upright to the middle of the rafter leg.
The brace provides additional rigidity of the roof truss on a roof with a large area or with a small angle of inclination of the slope. |
What to consider when calculating the roof
In accordance with SNiP 2.01.07-85, truss systems for low-rise buildings are calculated taking into account the following loads:
- The weight of the truss system;
- Weight of heat-insulating materials (if a warm roof is calculated);
- Roofing weight;
- wind load;
- Snow load.

The most important parameters for calculating the truss system are snow and wind loads. If the total weight of the roof can be controlled by the selection of roofing materials, then the loads of wind and snow have to be adapted.

A large accumulation of snow on the slopes leads to breakage or collapse of the roof. To compensate for the load of snow, the correct angle of inclination of the rafters is selected. But too much slope is the reason for the failure of the roofing in strong winds.

The optimal angle of inclination of a gable roof, taking into account snow and wind loads, is 30-45 °. With an increase in slope, we will get more intense convergence of snow, but at the same time, the wind load will increase.
The choice of the angle of inclination of the slope also depends on the floor area and on the desired dimensions of the attic space. The larger the area of the attic floor, the greater the angle of inclination of the roof. The ratio of these parameters is shown in the table.
| Total roof area, m² | Room area, m², with a ceiling height of 2 m | Skate height in meters | Roof slope angle |
| – | – | 1.73 | 20° |
| 4.65 | 0.93 | 2.22 | 25° |
| 12.95 | 2.59 | 2.75 | 30° |
| 18.95 | 3.79 | 3.33 | 35° |
| 23.75 | 4.75 | 3.99 | 40° |
| 27.55 | 5.51 | 4.75 | 45° |
| 30.75 | 6.15 | 5.67 | 50° |
If you plan to install an attic, you can use a sloping roof. The sloping gable roof with a mansard ensures intensive snow removal even with a slight inclination of the slope
.
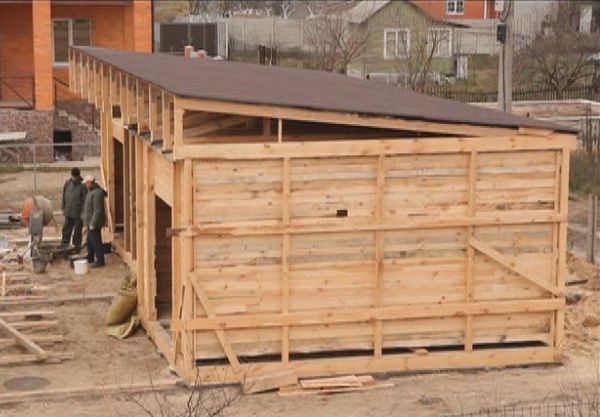
Construction of a roof on a house of aerated concrete blocks


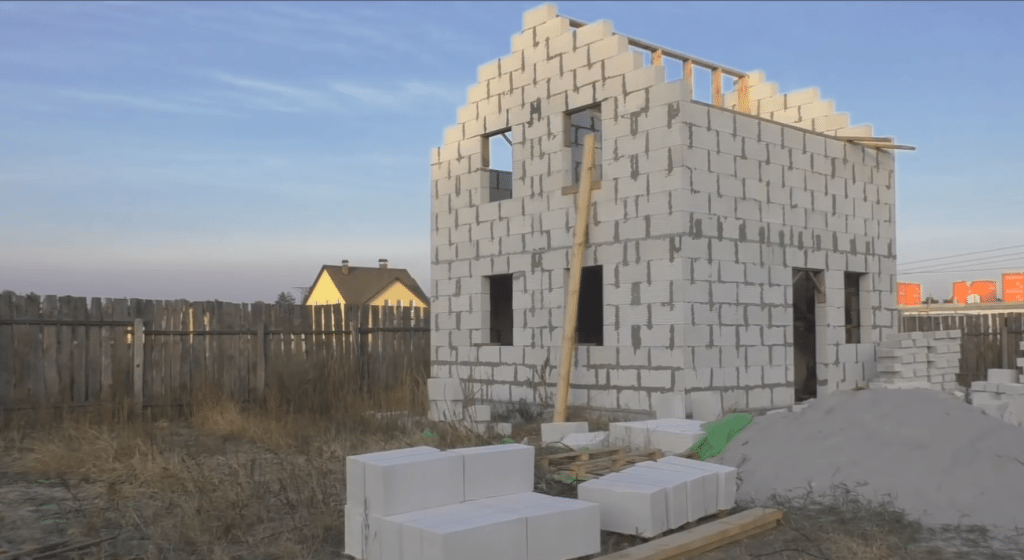
Step 1: prepare building materials

Let's find out how to make a gable roof using the following instructions as an example.
From lumber you will need:
- Boards 200 × 50 mm - for rafters;
- Boards 150 × 25 mm - for lathing;
- Bars 50 × 40 mm - for the counter-lattice.
Before building a truss system, we process the harvested lumber with antiseptic impregnations. We do this in advance, because it will not be easy to process an already finished design.

If the price of special antiseptic impregnations exceeds the planned budget, used engine oil can be used. Working off the surface of the lumber creates a hydrophobic layer that will prevent the boards from rotting.
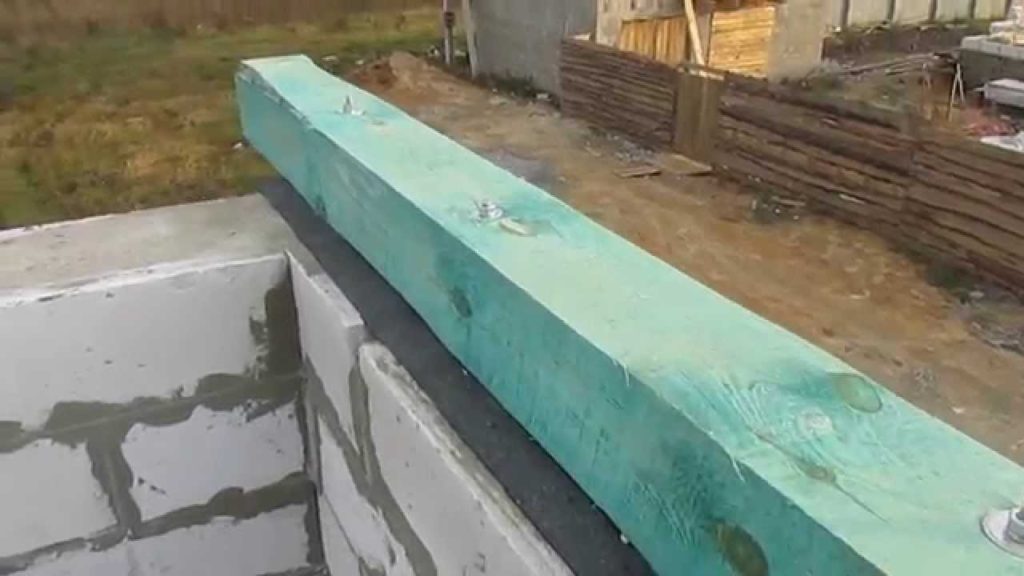
Step 2: install the Mauerlat
| Illustration | Stage description |
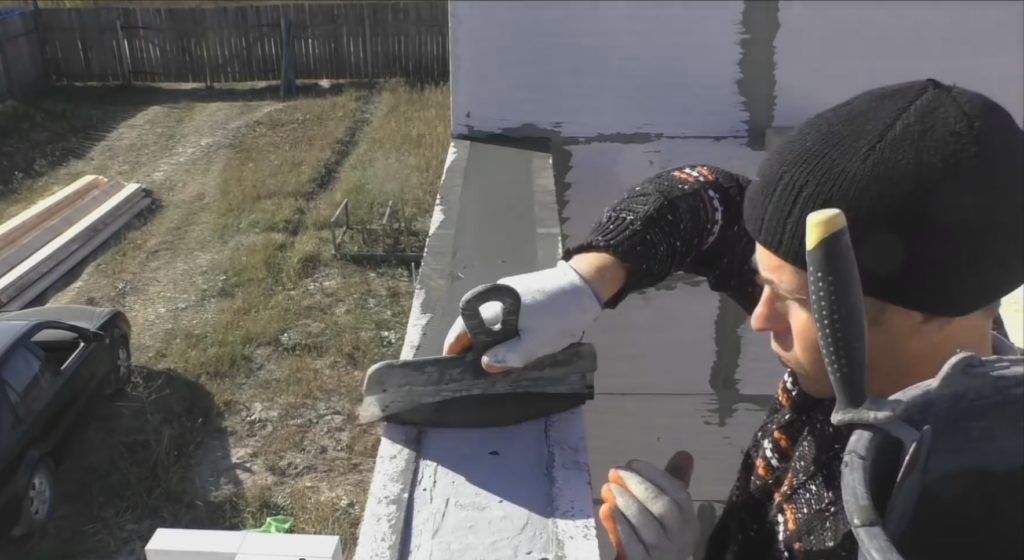 | Structural Wall Alignment. The end of the wall along which we will lay the Mauerlat is imperfectly even. Therefore, we level the surface with a cement-sand mortar or masonry adhesive. |
 | Laying waterproofing. On top of the dried solution we lay a strip of roofing material. So we exclude direct contact between wood and concrete. If there is no roofing material, the surface of the bearing wall can be coated with bituminous mastic or simply melted resin. |
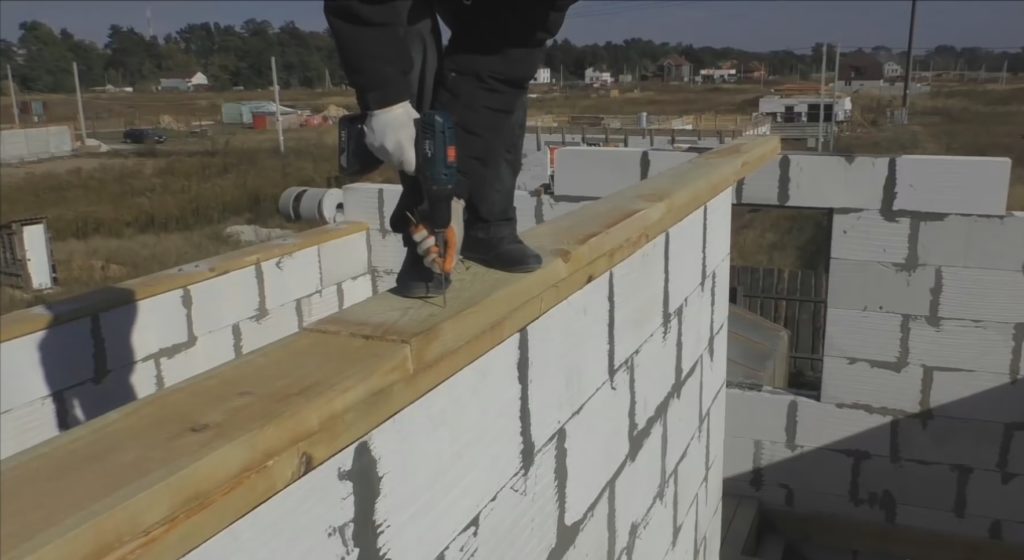
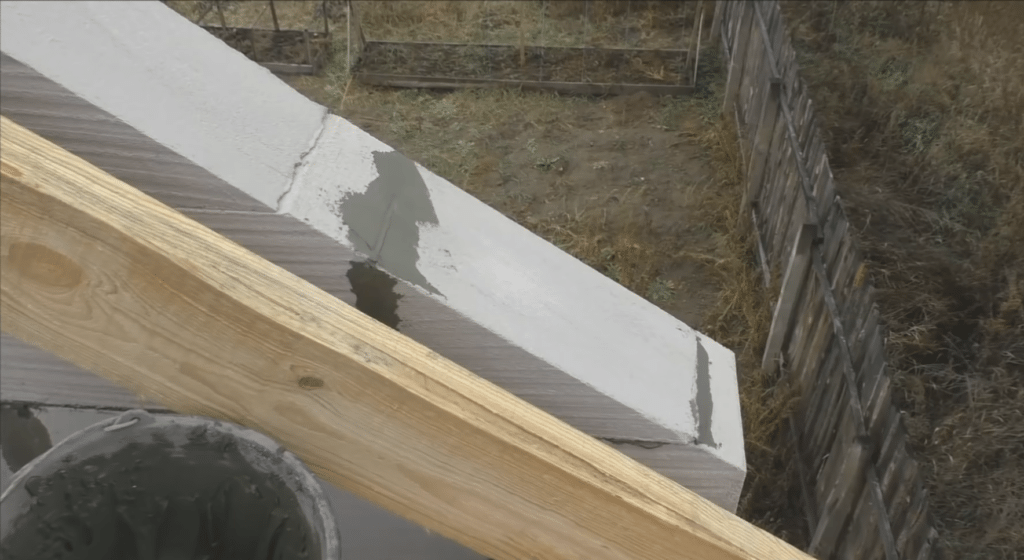
 | We lay the Mauerlat. Since the roof area will be small, we use not a beam, but a board 200 × 50 mm as a Mauerlat. We lay out the board flush with the outer edge of the wall. |
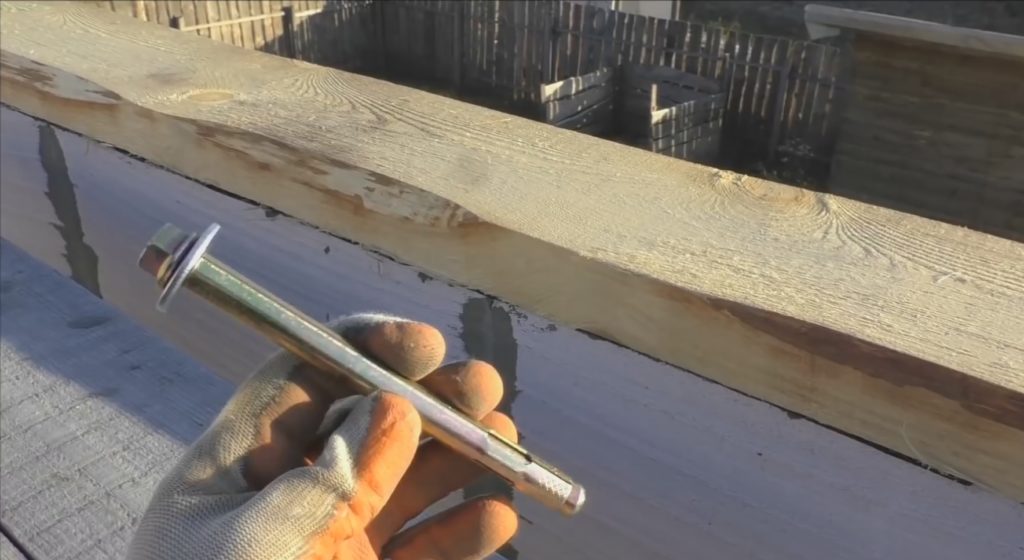 | We mark the Mauerlat for anchors. We make the markup so that the anchor is located at a distance of 15 cm from the place where the rafters are attached.
We will use anchors with a length of 150 mm and a diameter of 12 mm. We immediately prepare the washers, as shown in the photo, so that the bolt presses the board. |
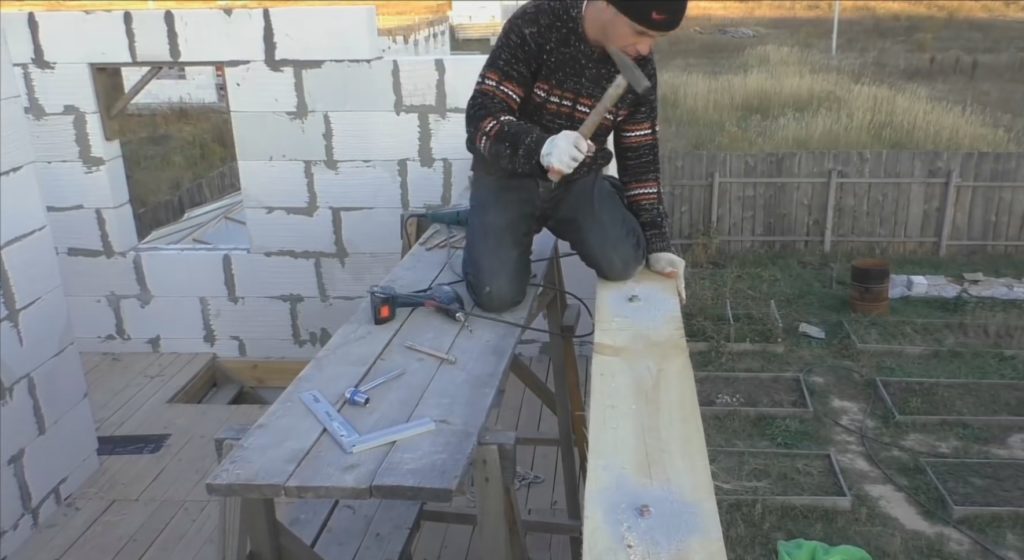 | We fix the Mauerlat. We drill the board through with a drill for wood at 12. Through the hole we pass into the wall with a drill at 12 and drill 150 mm deep.
We drive anchors into the prepared holes. We twist the anchors so that the nut, through the washer, presses the board. |
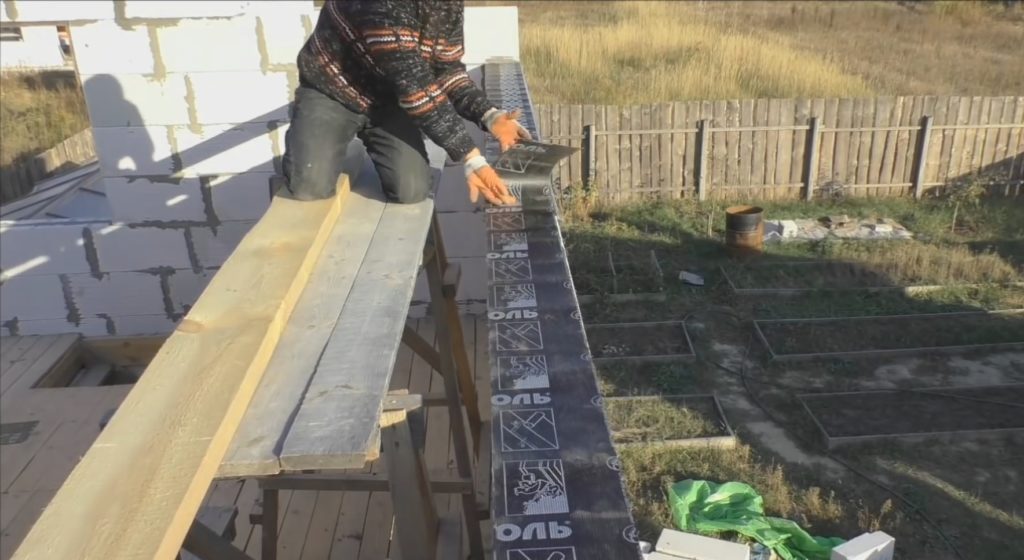
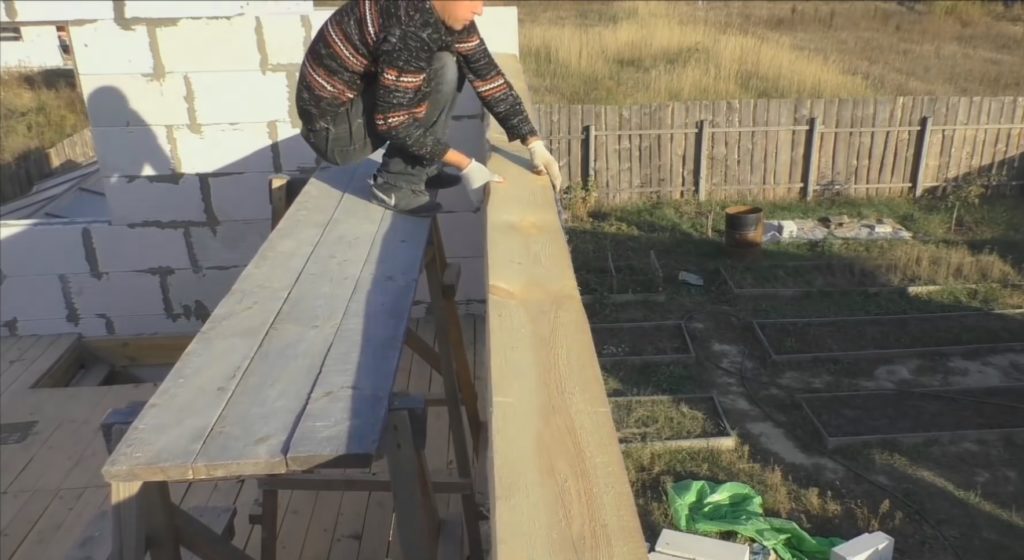
Step 3: install the bed
This stage is performed in the same way as laying the Mauerlat, and therefore we use the same building materials and the same anchors. But there is a difference - if one longitudinal board was used as a Mauerlat, then we will use two boards stacked on top of each other as a bed.
| Illustration | Stage description |
 | Leveling the interior wall. To do this, we use a masonry mortar with which we fill the relief.
. |
 | Installation of waterproofing. We lay the roofing material in strips.
. |
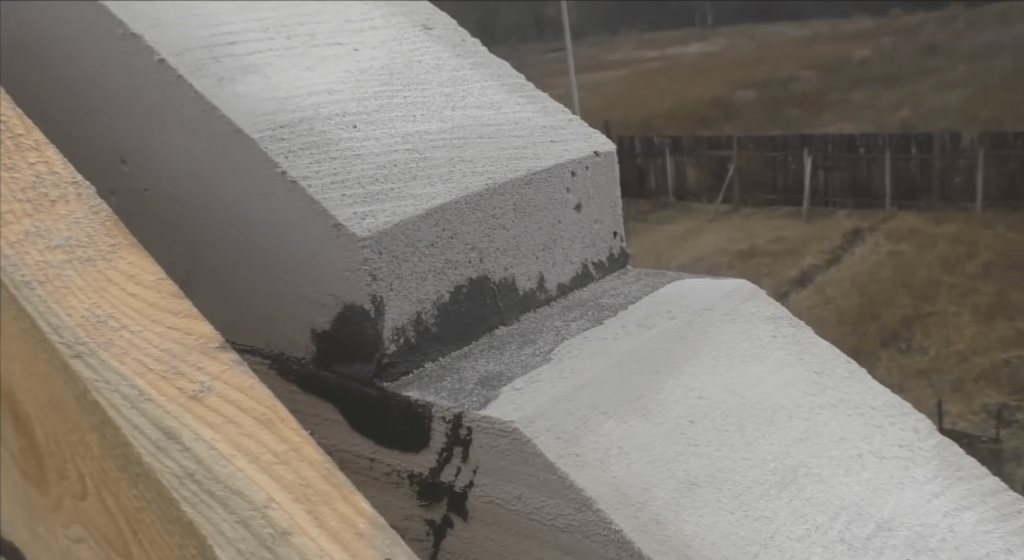
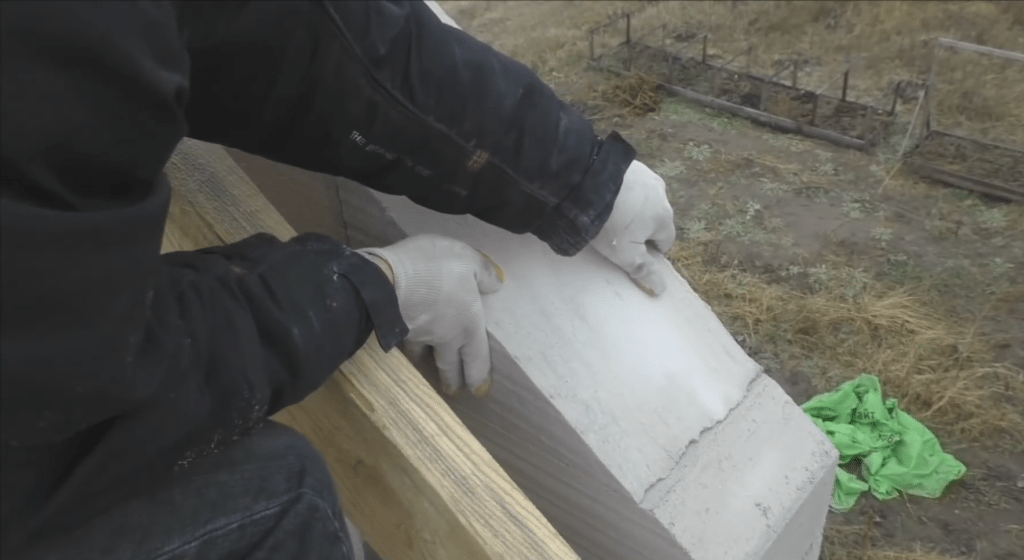
 | Bed laying. Lay the boards so that their edge is flush with the edge of the wall. |
 | Bed mount. We drill a hole through two boards to concrete. Then we drill concrete to the depth of the anchor with a drill.
We drive the anchors into the drilled holes and press the bed to the wall surface. |
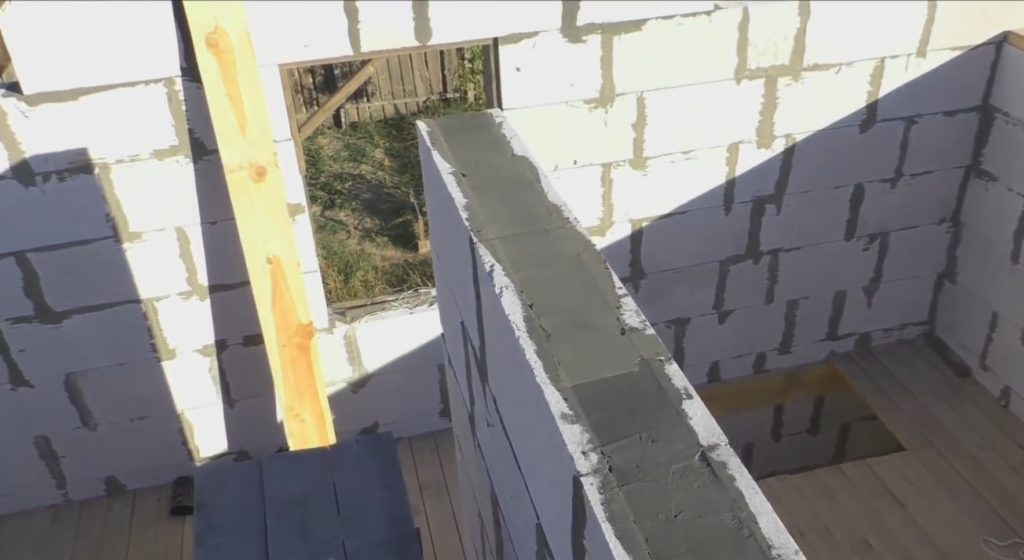
Step 4: Lay the Gable

The pediment can also be laid after the assembly of the rafters. But it is better to lay out the blocks in advance, as the finished rafters will interfere with the masonry work.

The laying of the pediment of aerated concrete blocks is carried out with the displacement of the next row relative to the previous one. For high quality masonry, we use only special glue.
In order for the pediment to be even, after laying each new row, we check the correct installation in the vertical and horizontal plane.
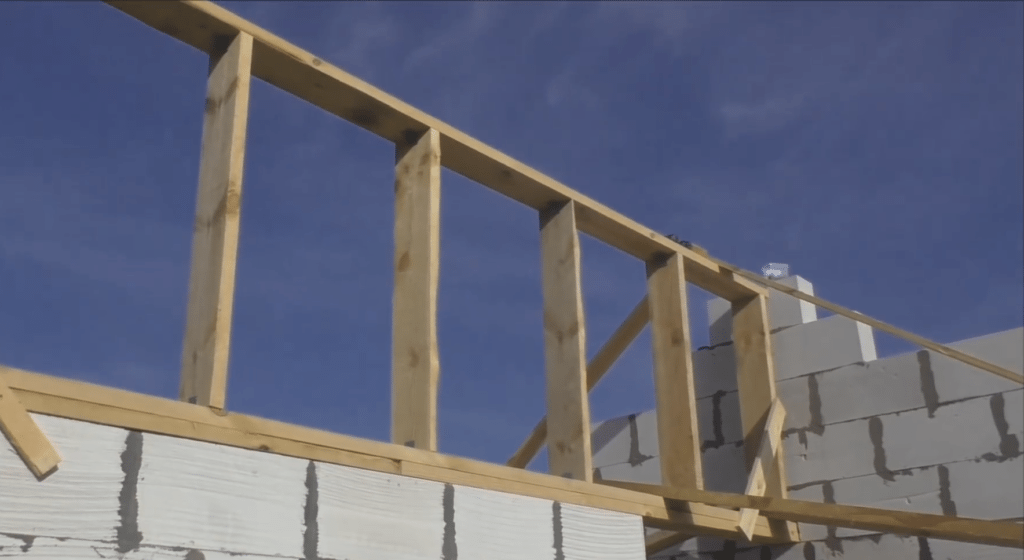
Step 5: install racks and girders
| Illustration | Stage description |
| | We make the layout of the bed. In accordance with the design of the roofing system, we mark the location of the rafter legs on the bed. According to the location of the rafters, with an indent of 50 mm, we will install racks. |
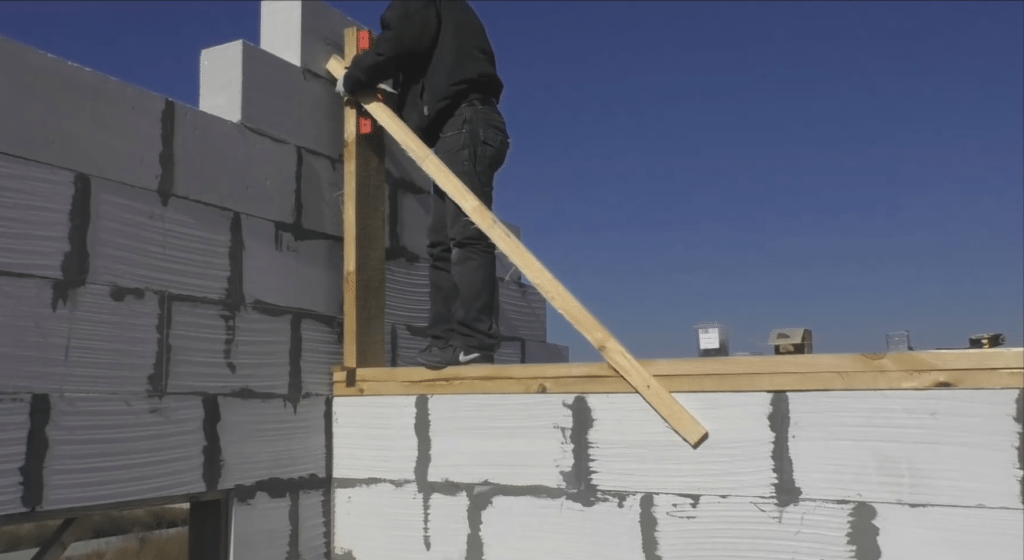 | Installation of two extreme racks. We install extreme racks that will be adjacent to the gables.
We make racks from a board 200 × 50 mm and fasten to the bed with L-shaped hardware and self-tapping screws. Additionally, we fix the racks on the bed with diagonal struts. |
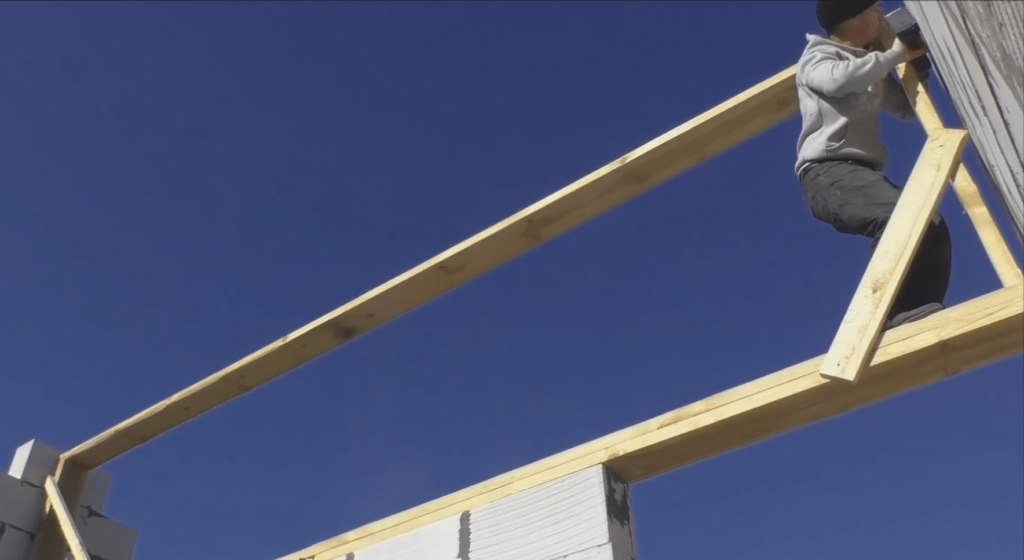 | Run setup. We fasten the run with L-shaped hardware and self-tapping screws.
We check the level of the position of the run along the horizon. If the level is filled up, we eliminate the difference by sawing one of the racks or adjusting the mounting hardware in height. |
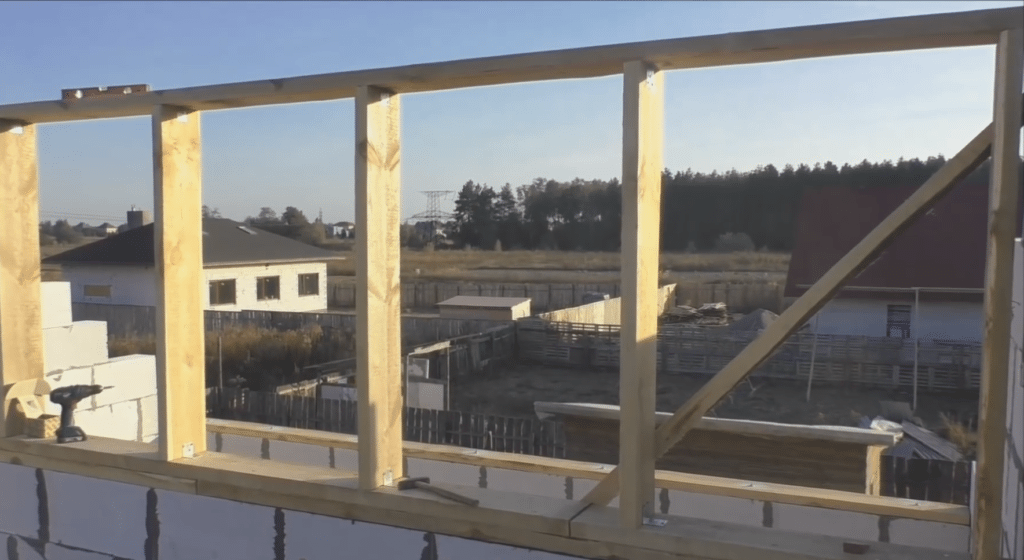 | Installing intermediate racks. We do this in the same way as we installed the extreme racks, but according to the corresponding marks on the bed. |
Step 6: Installing the rafters
| Illustration | Stage description |
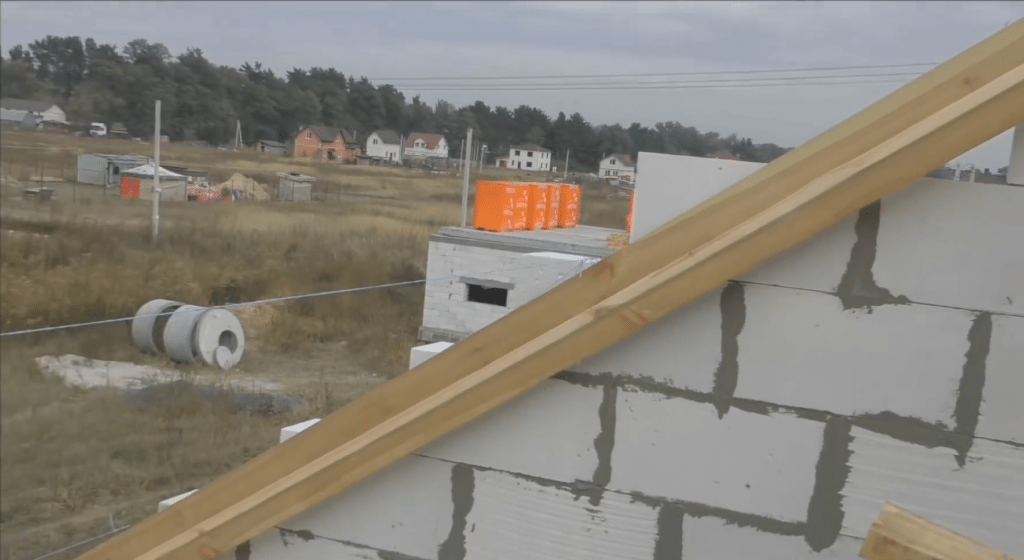
 | We transfer the boards to the installation site. We calculate the required number of boards and, one by one, raise them up.
We lay out the boards brought upstairs with one end on the Mauerlat, and with the other end on the bed. As a result, there should be two boards near each rack. |
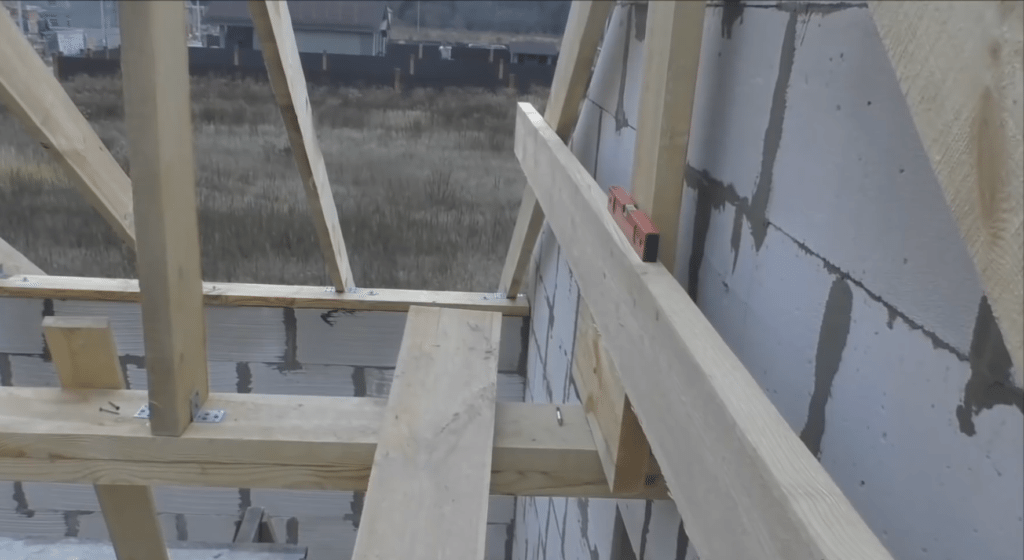
 | Purlin alignment. We measure the distance from the edges of the run to the Mauerlats.
Most likely, there will be a slight distortion. To align the run, temporarily fasten the diagonal struts, as in the photo. |
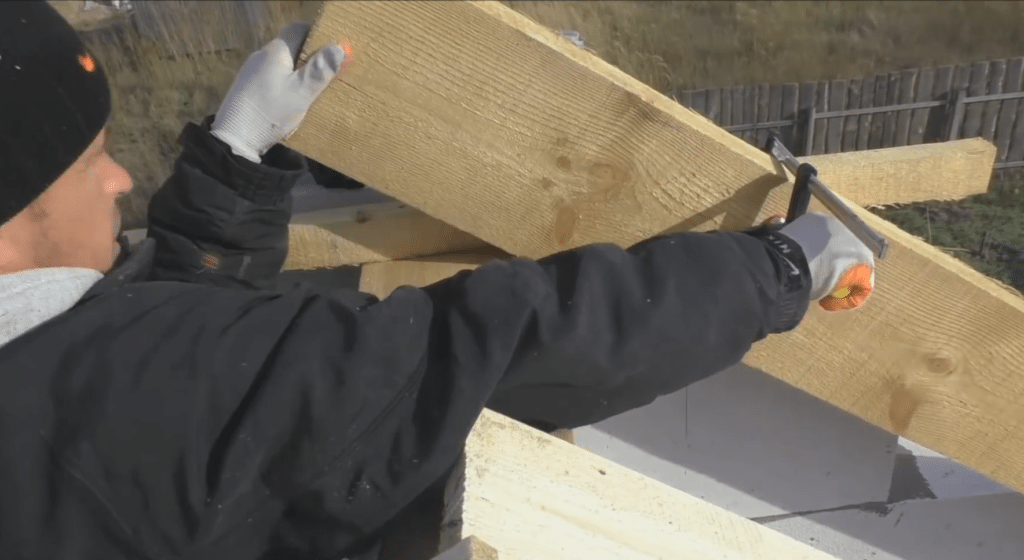 | We start the rafters on the run. On the run, close to the mark on which the rafter leg will lie, we fasten the bar. We pull the rafter beam to the bar with a clamp. |
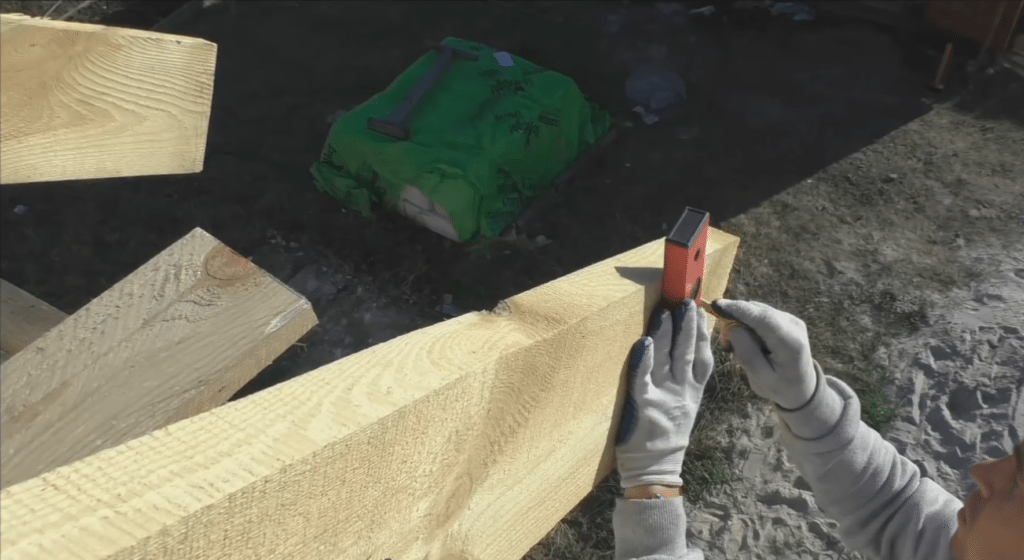
 | We make markup for the run and Mauerlat. With the help of a square, we mark the rafters in the part with which they will lie on the run and on the Mauerlat.
To get the same markup for the cutout, you can make a template from thick cardboard. But the template can only be used if the rafters are the same in width. |
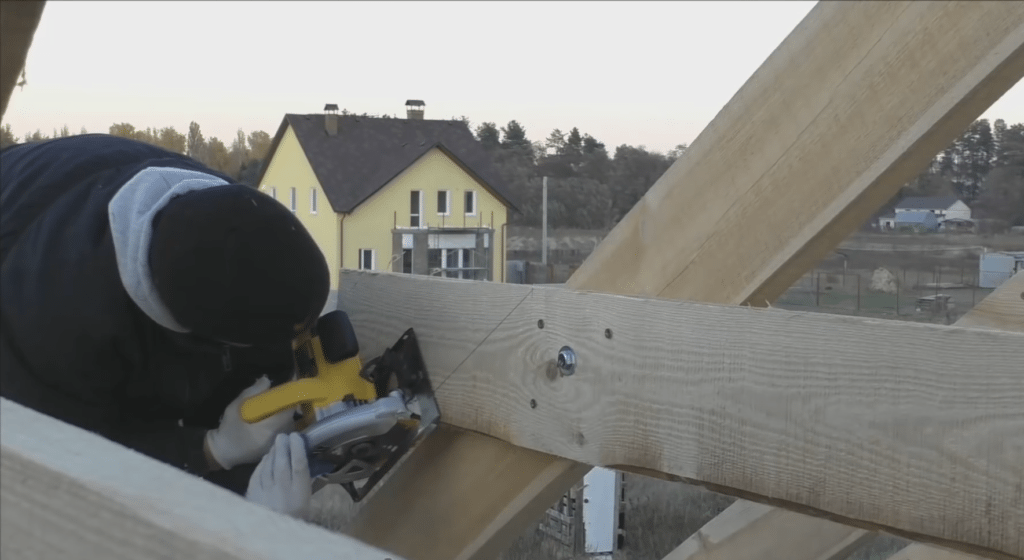
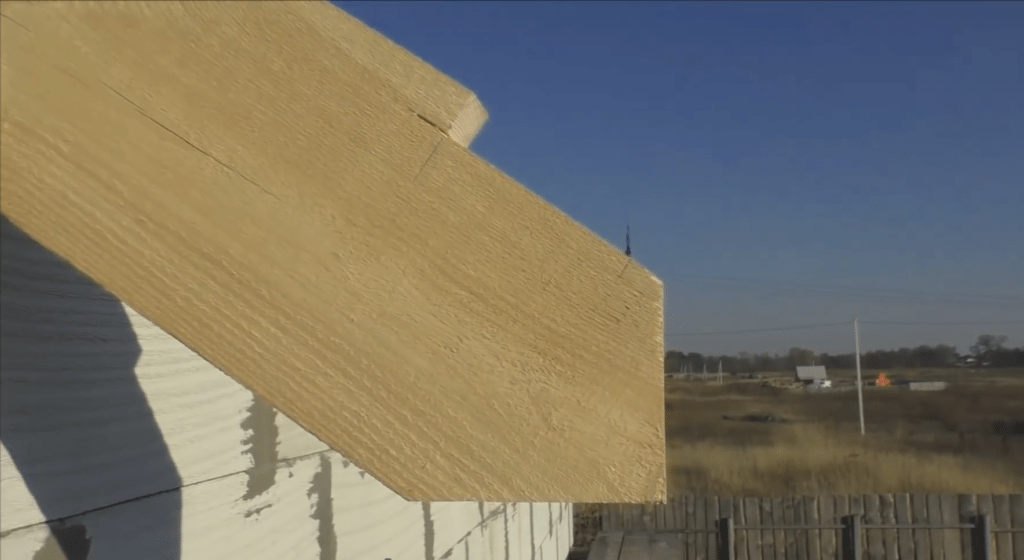
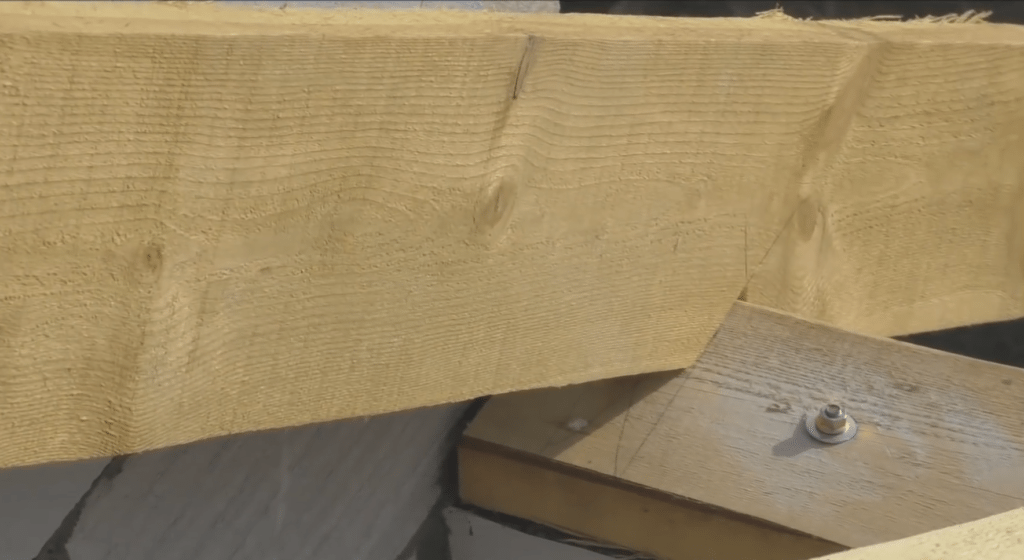 | Cutouts for the run and Mauerlat. By marking with a miter saw, we make cutouts.
We apply the prepared board with one edge to the run, and with the other edge to the Mauerlat. We do the same work with an adjacent beam. |
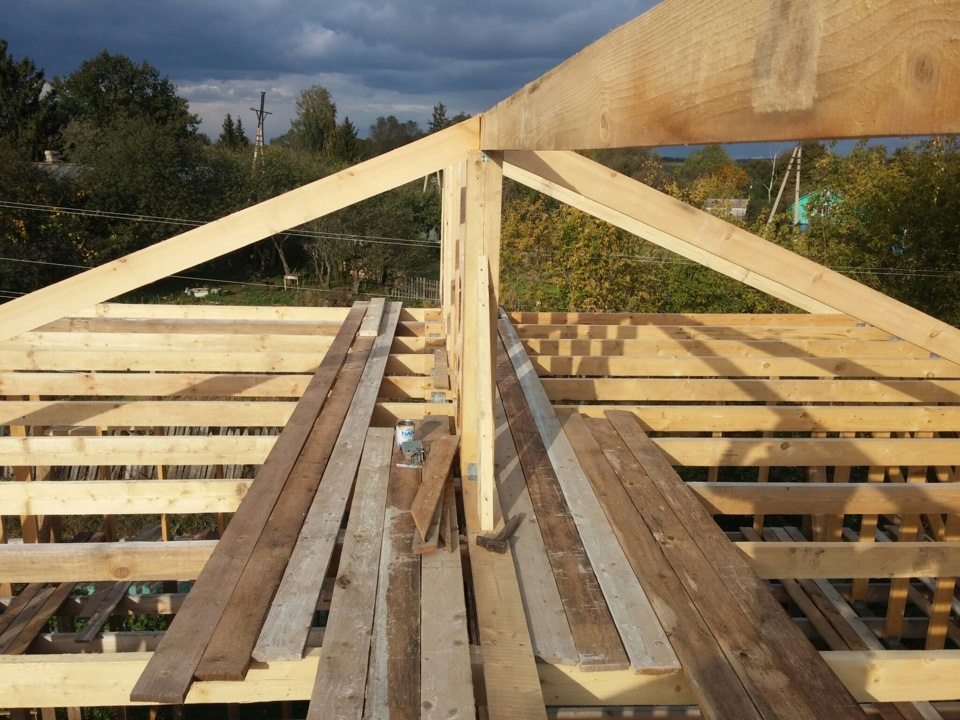
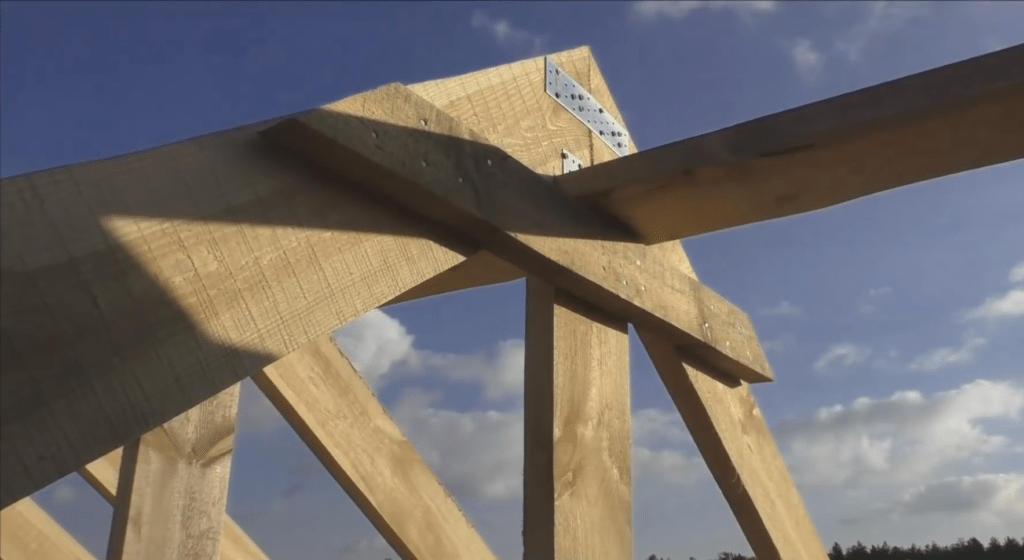
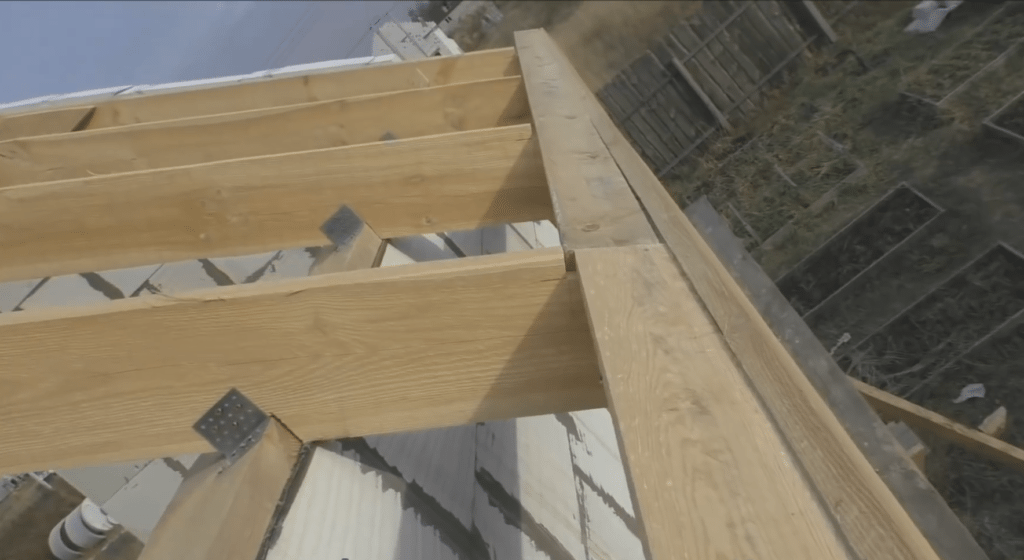
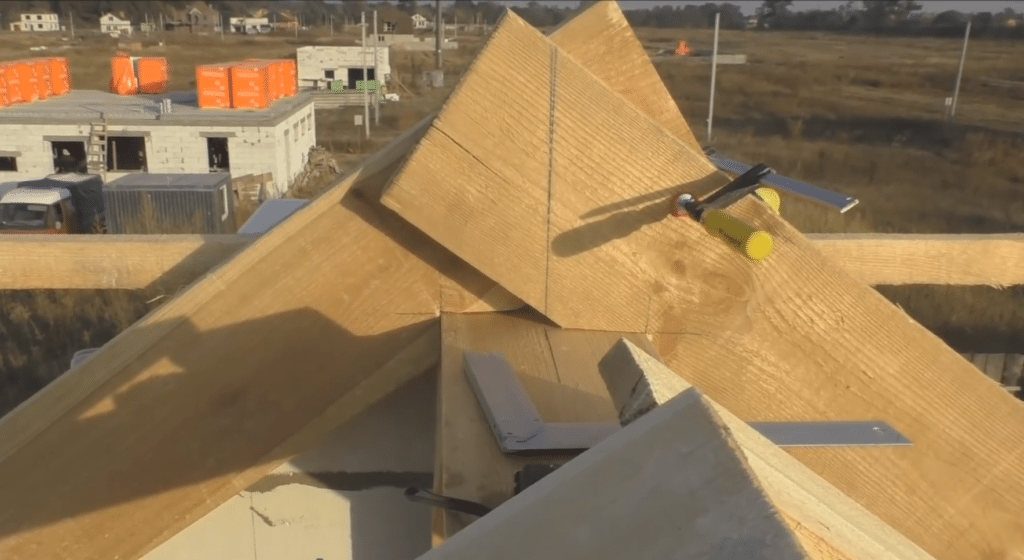 | Trying on and cutting adjacent rafters. We bring the prepared rafters to the line skate, join and mark, as in the photo. According to the markup, we cut adjacent boards so that there is an even joint between them. |
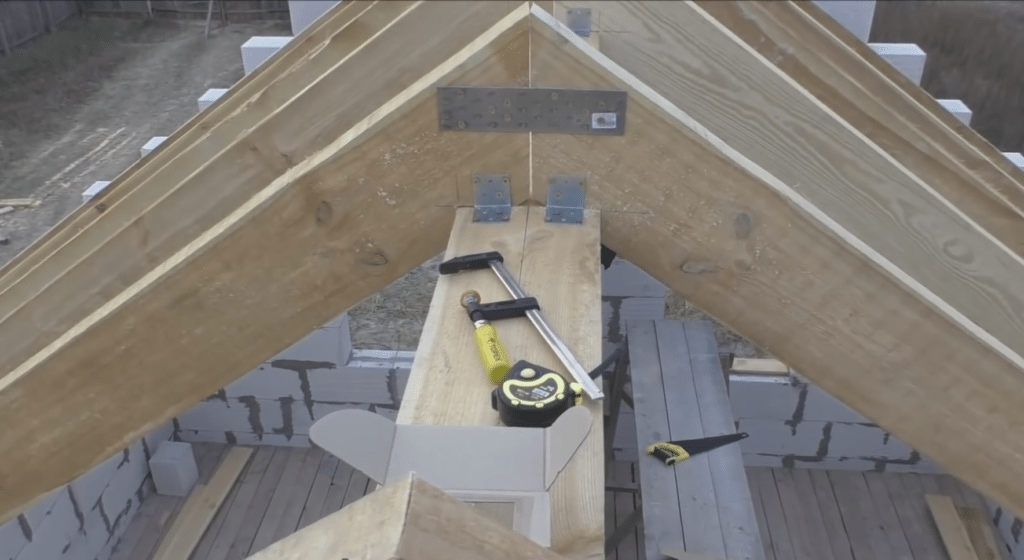 | Rafter fastening. We connect the rafters with perforated fastening hardware, and fix it on the Mauerlat and on the run.
In the same way, we install the rafters from the side of the opposite pediment. |
 | Landmark stretch. We mark the same distance on the rafters, for example, a meter from the ridge. According to the markup, we screw in the screws.
We stretch a cord between opposite rafters, which will mark the edge of the rafter system. |
| | Installation of intermediate rafters. Installation is carried out according to the previously made mark. Be sure to check the verticality of the rafters by level. |
After the rafters are assembled, we finish work with the gables. At this stage, we will make and install additional elementsto give the masonry a finished look.
| Illustration | Stage description |
 | Gable marking. Along the line of the rafters, we mark the laying of aerated concrete blocks. |
 | Block pruning. According to the markup, we cut down the protruding sections of the pediment. |
 | Production of additional elements. From pieces of aerated concrete blocks, we cut out liners according to the size of the recesses at the end of the gable. We try on the made additional elements in place and, if necessary, correct them. |
 | Laying additional elements. We make masonry glue and lay additional elements in the corresponding recesses. |
Step 7: Strengthening the rafters with puffs and braces
To make the roof more stable, we will install reinforcing elements - braces and puffs. We will make reinforcing elements from a board 200 × 50 mm and fix it on adjacent rafter legs, passing through the rack.
| Illustration | Stage description |
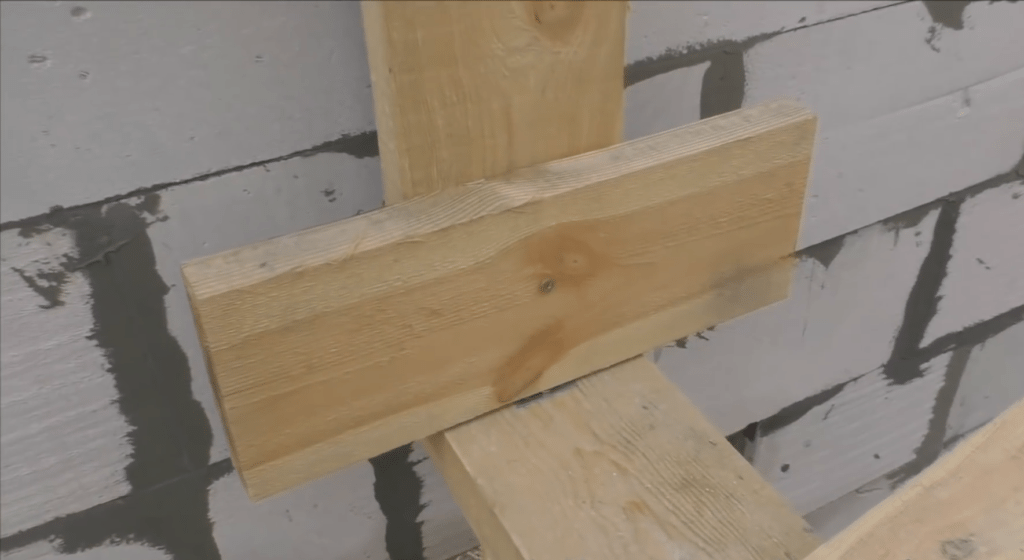 | Template installation. Cut off a piece of board 200×50 mm, which we will use as a template. We fasten the template at the junction of the rack and the bed, as in the photo. |
 | Puff mount. On the template, by level, we set a horizontal board. We fasten the leveled board along the edges to the rafters with bolts through through holes. In the center, we fasten the board with self-tapping screws to the rack. |
 | Trimming the puff along the line of the rafters. From the end of the puff, mark the line of passage of the rafters. According to the markup, we cut the edge of the board. |
 | Installing the remaining puffs. Following the example of the first puff, we collect and fasten subsequent puffs to the opposite gable. |
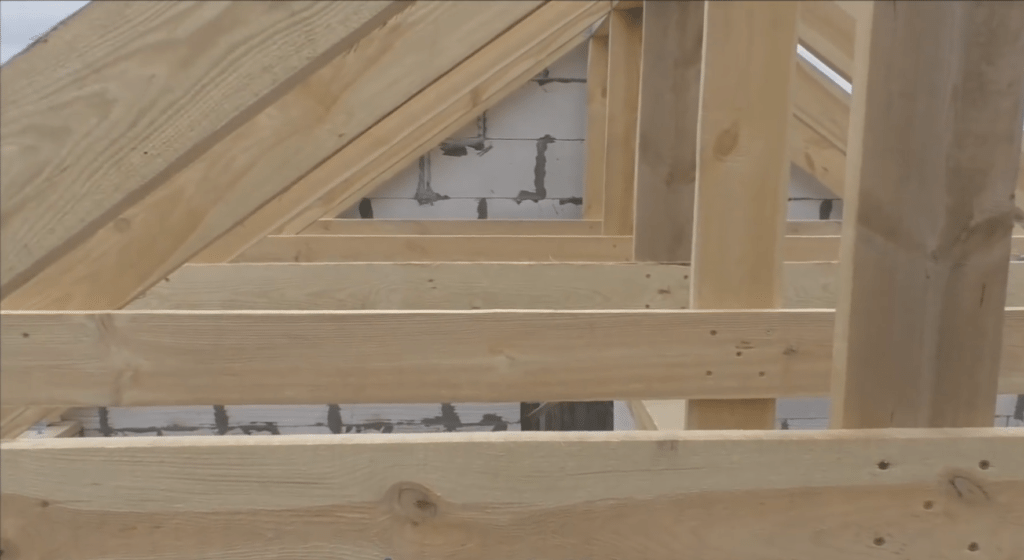
 | Installation of crossbars. We make spacers from a 150 × 25 mm board, which we fasten close to the bottom of the run. We fasten the crossbars with self-tapping screws on the rafters and on the rack. |
Step 8: trimming (trimming) rafters
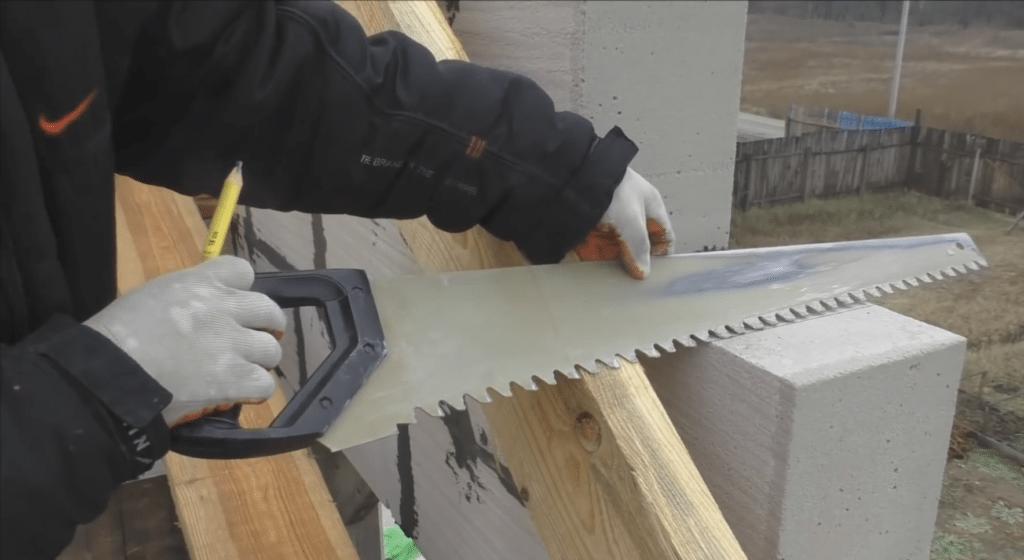
| Illustration | Stage description |
 | Overhangs marking. The optimal length of the overhangs of the rafters is 50-60 cm. We measure this length along the bottom of the overhang from the wall.
We apply a level to the mark and draw a vertical line along it. From the vertical line, we draw the shape of the overhang, taking into account the subsequent location of the cornice strip. |
 | Trimming overhangs. According to the markup, we cut off the end of the rafter leg with a miter saw. We perform a similar operation on all rafter legs, along the perimeter of the roof.
In the photo, the overhang of the truss system - the front cut should be vertical, and the bottom cut should be horizontal. |
Step 9: Installing the roofing pie
| Illustration | Stage description |
 | Installation of frontal and cornice boards. In the front part of the overhang, in specially made cutouts, we lay boards 100 × 25 mm.
We fasten the boards laid in the cutouts with two self-tapping screws to each rafter leg. |
 | Remove the protective film from the drip. The protective film must be removed prior to installation.After installing the bar, it will be difficult to cope with this task. |
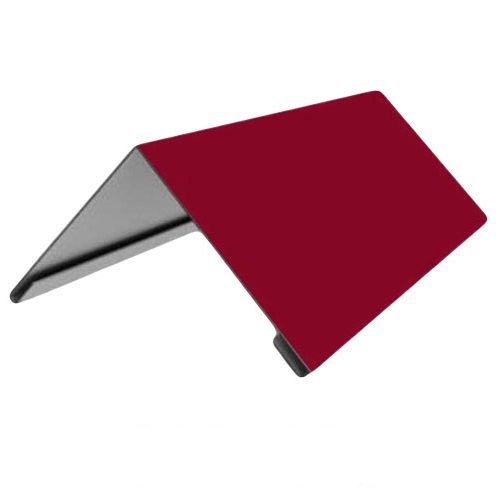
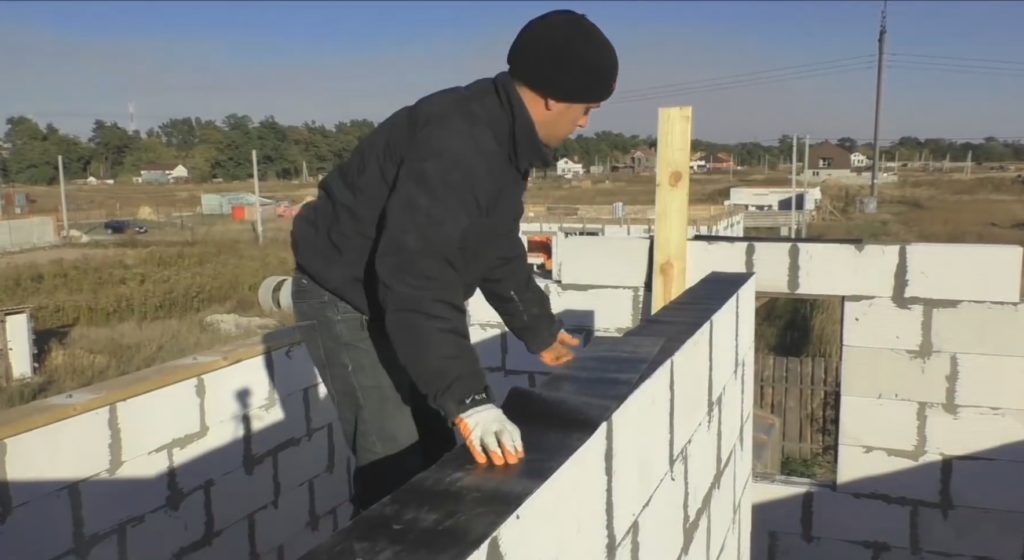
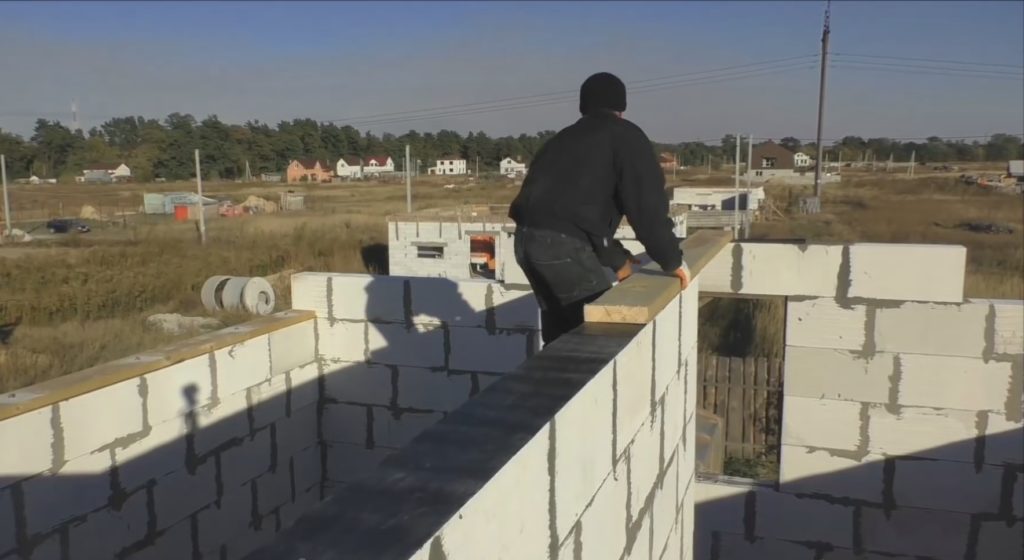
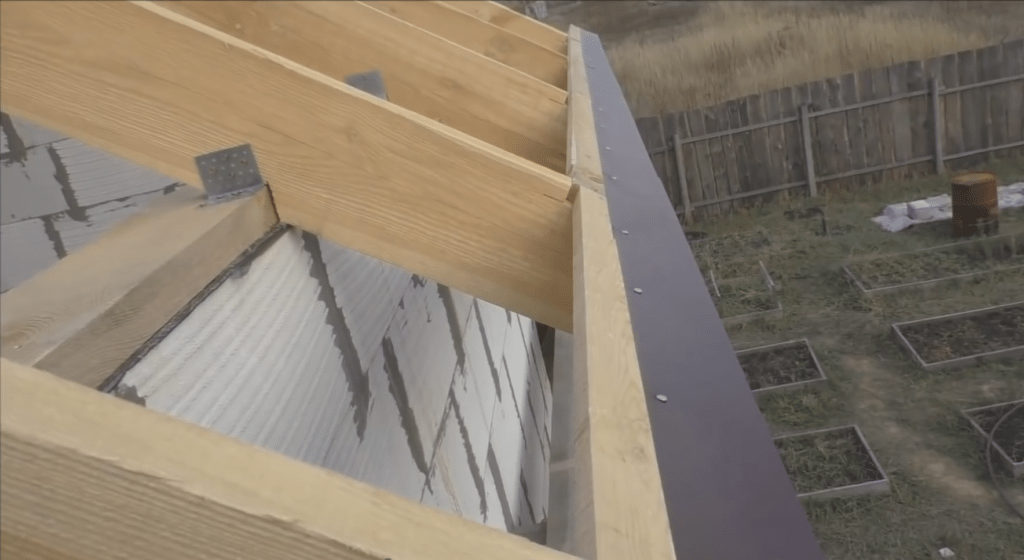 | Dropper installation. We fasten the drip bar to the roofing nails. We hammer nails along the upper edge of the dropper in increments of 30 cm.
When hammering nails, we try not to push through the dropper so as not to damage the protective layer of the paintwork. |
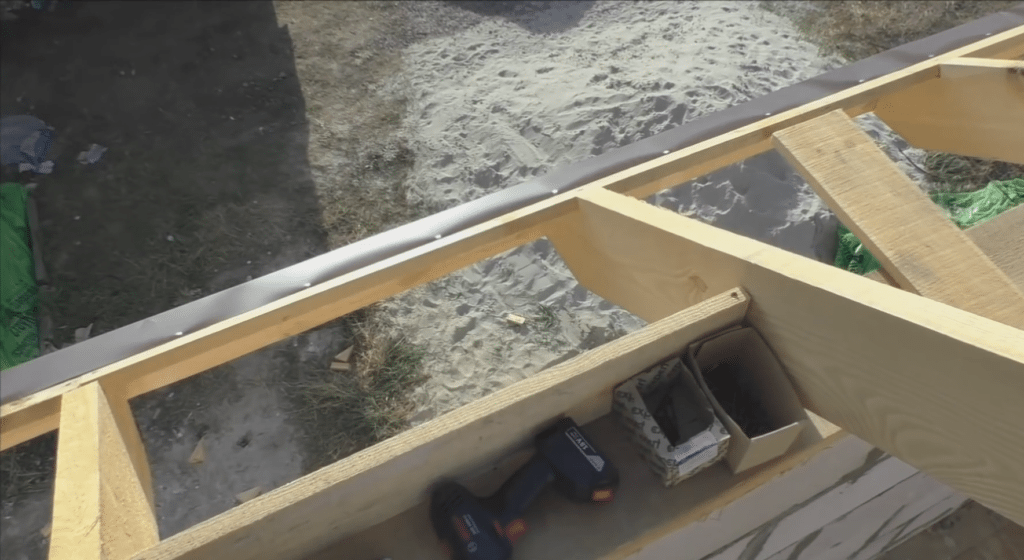 | Installing plugs on rafters. We cut out the plugs from the board 150 × 25 mm and install them in the gap between the rafter legs.
Plugs are needed so that the insulation from the mineral wool slabs does not slide down. |
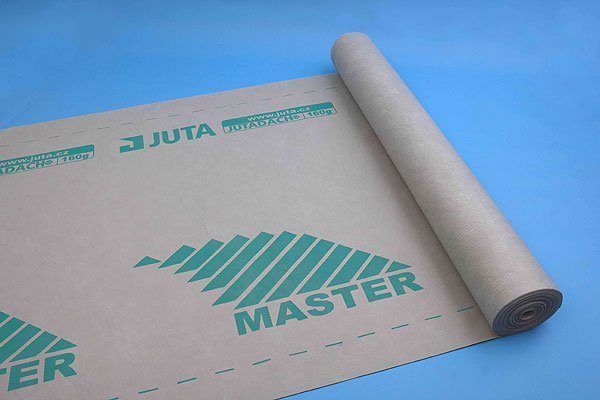
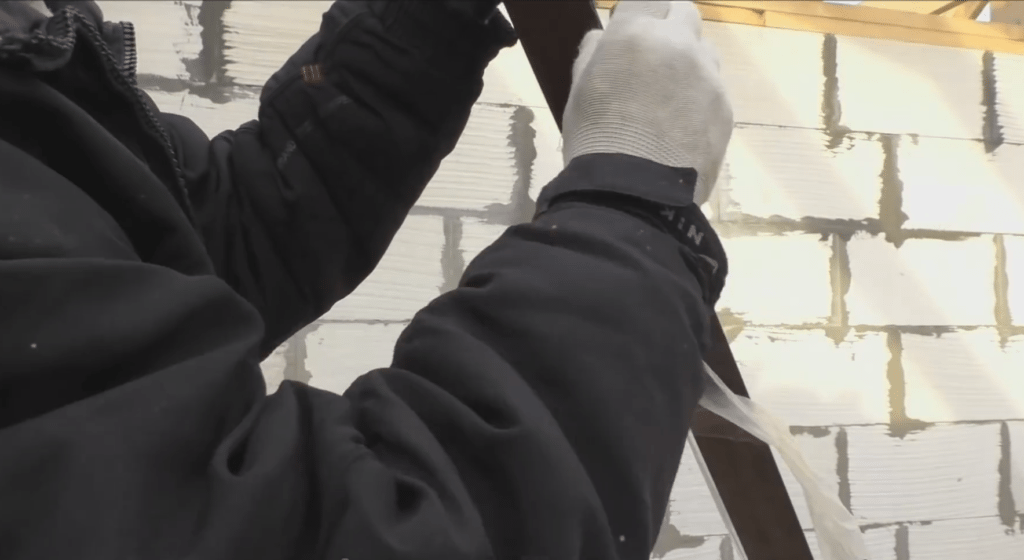
 | Preparing the dripper for membrane installation. Glue double-sided tape along the upper edge of the dropper. On this adhesive tape we will then fix the vapor-permeable membrane. |
| Lathing installation. Through the lined vapor-permeable membrane, we attach the bars to the rafters. On the bars with a step of 30 cm we install the transverse boards of the crate. | |
| Ridge waterproofing. At the level of the ridge, we push the membrane under the crate. After that, we tighten the bars of the crate with self-tapping screws. | |
| Trimming the sheathing at the ends of the slopes. We stretch the cord between the ridge and the frontal board at a distance of 50 cm from the gable.
We make markings along the cord. Trim the edges with a miter saw. | |
| Strengthening the edge of the crate. Along the entire slope, the edge of the crate is hemmed with a bar. We fasten the bar on each board with two self-tapping screws. | |
| Installation of roofing material. We lay out the sheets of metal corrugated board and fasten them along the crate with self-tapping screws with press washers. |
Conclusion
Now you know how to make a gable roof at home with your own hands. The proposed instructions will be useful when building a country house or cottage. To learn even more on the topic, watch the video in this article. If you still have questions about the technology and need clarification, write about it in the comments.
Did the article help you?