Roofing with Ondulin is the choice of a large number of developers today, which is not surprising, given how light and at the same time durable these corrugated roofing sheets are. If ondulin has become your choice, the installation instructions for the material offered in this article can be very useful to you, since we will try to consider every detail and point out the most important points when laying this coating.
It should be noted that ondulin flooring is the best choice if the task is to make a reliable coating that can last for decades, and the purpose and type of the structure to be covered, as well as the climate conditions in the region planned for development, are not critical.
About installing an onduline roof
 If you plan to install ondulin with your own hands, then in this case it is quite possible to get by with the efforts of one person, since the weight of the sheets and the ease of their processing are conducive to this.
This kind roof covering not only a house or cottage can be laid out, but also a bathhouse with a gazebo, as well as other outbuildings.
The objective advantage of ondulin roofing in comparison with other materials is the possibility of laying the flooring directly on the previous roofing. This will avoid the costs associated with the dismantling of the old coating, and also prevent even temporary under-roofing under the open sky.
The technology of laying ondulin is quite simple. Before starting installation, you should study in detail the rules that the ondulin installation instructions offer, which comes with the material and component parts.
In addition, the instruction is at the same time the right to receive a guarantee from the manufacturer and supplier, so it is highly undesirable to lose it.
The main condition put forward by the manufacturer to ensure a guarantee for materials is compliance with the entire list of conditions and requirements specified as the rules for installing an onduline roof.
In addition, it must be remembered that the terms of the guarantee apply only to those Ondulin materials that were purchased from official representatives and partners of the manufacturer of the same name and are original.
Before laying ondulin with your own hands or with the assistance of a team of professional installers, it is imperative to check compliance with all the following rules for installing this roof.
Rules for laying roofing Ondulin
- During the laying of ondulin, it often becomes necessary to move along the sheets of the coating. So, in this case, one should only step on the convex sections (waves) of the material and avoid furrows (recesses) between them.
- Laying ondulin should be carried out only at positive temperatures. If there is a need for urgent installation, then it can be done with extreme caution at a temperature not lower than -5 degrees. At lower temperatures, roofing work with ondulin is prohibited. It is also not recommended to install ondulin coatings at high temperatures (over 30 degrees).
- As for fastening ondulin, the fastening of sheets to the crate should be carried out using special roofing nails. When using special nails for ondulin, the laying technology involves fixing the sheet with exactly 20 nails. Each cover sheet must be attached in this way. This requirement is considered a guarantee, and if it is not observed, the coating may be destroyed under the influence of gusts of wind. For this reason, when employing hired workers, it is advisable to independently control the workflow and ensure that specialists follow all the rules for laying the material.
- Before you cover the roof with ondulin, it is necessary to complete the crate.The crate for ondulin is made of wooden beams with a section of 4 * 6 cm. The value of the crate step is chosen depending on the degree of roof slope:
- up to 10 degrees - use a solid boardwalk;
- 10-15 degrees - the pitch of the crate is provided for no more than 450 mm;
- over 15 degrees - the pitch of the crate is selected no more than 610 mm.
Advice! The crate should be mounted after the substrate under the ondulin is laid in the form of the Ondutis vapor barrier lining film recommended by the manufacturer.
- According to the technique of laying an ondulin roof, it is not permissible to overlap from 4 sheets at one corner. This can cause deformation of the edges of the onduline sheets.
- As for the direct work with the material, it is not at all difficult due to the low weight and flexibility of the material. Given this fact, some inexperienced installers can pull the sheet, which was crooked at the beginning, to the desired position. At first, such a sheet will look even, but after some time, the entire roofing deck can go in waves due to such stretches. How to fix ondulin correctly? First of all, in the process of fastening the sheets, it is necessary to monitor the linearity of the vertical and horizontal connections of these sheets over the entire roofing surface. You should also avoid stretching sheets of ondulin. Before fixing them with nails, you need to make sure that they lie flat.
Instruction: ondulin is laid in such a way that the sheets of material hang from the cornice by no more than 70 mm
- roof overhang should be arranged as the ondulin installation instructions say. If you make it excessively long, it will bend, but if it is short, precipitation and various debris will penetrate under it.If the size of the crate step is incorrectly calculated, most likely, the entire installation process will fail, and as a result, all the work will have to be redone again or the roof repaired ahead of time. Repairing an ondulin coating is quite difficult, because it is difficult to remove a damaged sheet without violating its integrity. Before even slightly deviating from the instructions, you need to think again whether it is worth risking the durability of the roof and the right to guarantee it just because there is no desire or time to correct a mistake made during installation.
Ondulin roofing laying technique
Actually, now we will directly consider the instructions for laying ondulin:
- Sheet overlap ondulin roofs each other, as with the device of the crate, will depend on the slope of the roof slopes. For example, if it fluctuates between 5-10 degrees, the side overlap of the sheets should be two waves, and the overlap along the length of the sheet should be 300 mm. With a slope of 10-15 degrees, the side overlap will be one wave, while the overlap in length will be 200 mm. If the slope exceeds 15 degrees relative to the horizon, the side overlap will also be one wave, and the overlap in length will be 170 mm. Laying ondulin: the instruction provides for the installation of coating sheets with an overlap along their length from 17 to 30 cm, depending on the roof slope
- The installation of the lathing bars for ondulin is carried out in accordance with the step, which is selected according to the previously discussed rules. In this case, the bars are nailed to the rafters at the required center distance from each other.In order to maintain the parallelism of the crate, as a rule, a wooden jig is used, which is a wooden block of the desired length.
- Before mounting ondulin, it is necessary to prepare the layout of the sheets, according to which cutting into pieces of the required sizes will be made. It is necessary to mark the ondulin clearly and accurately, using a colored pencil and a piece of paper as a template.
Advice! To cut the material for the installation of an ondulin roof, it is better to use a wood saw with a small tooth size, periodically lubricating the blade to prevent the tool from getting stuck. They also allow the use of hand and circular saws.
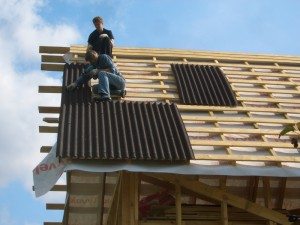
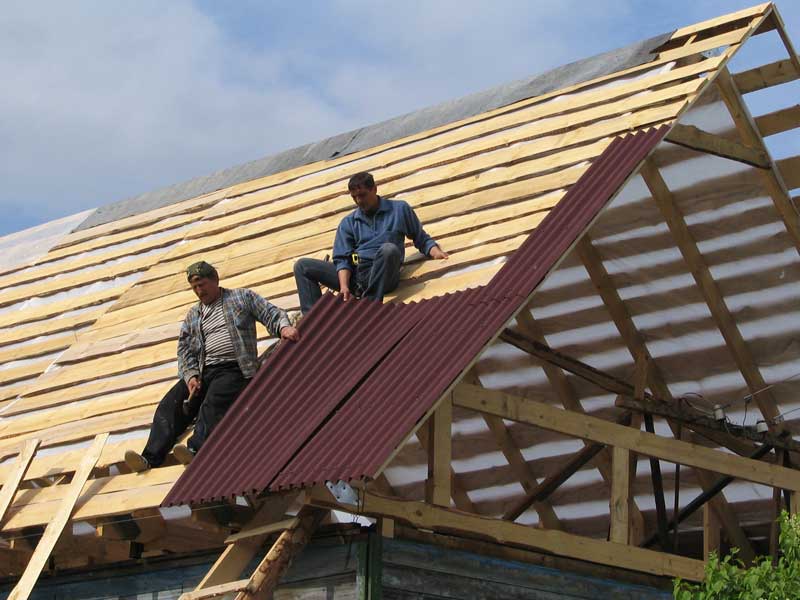
- When the roof is covered with ondulin, the sheets of material are first lifted up. One person can also do this, since the mass of the sheet is a little more than 6 kg.
- Before laying ondulin, it is necessary to study the installation procedure for roofing sheets. Installation must begin from the edge of the slope, located on the side opposite to the direction of the prevailing winds. The second row begins with laying half of the sheet to ensure that the overlap is not 4, but 3 sheets at the corner. This method can greatly facilitate styling.
- When attaching sheets of ondulin, nails are nailed into each wave at the ends of the sheets, at both edges of the side overlaps and in the middle of the sheet through one wave. Each sheet should go exactly 20 nails.

Ondulin: how to fix roof sheets - To perform fasteners strictly along the line of the axis of the lathing beam, a signaling rope is pulled over the axis.
- When constructing roofing valleys, special elements manufactured by Ondulin are used. For their installation, it is supposed to lay additional lathing bars.
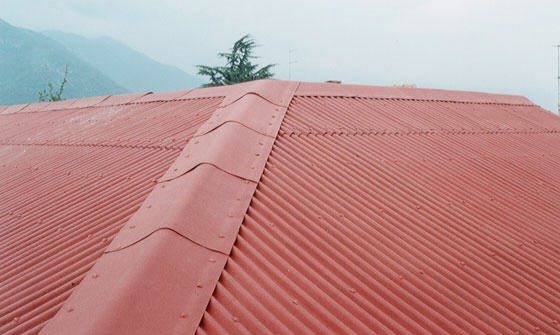
- As in the case of valleys, Ondulin ridge elements are used when constructing roof ridges. Their fastening starts from the leeward side and provides for an overlap of the elements on each other at least 125mm. Nails need to be driven into all the waves of the sheet, docked with the ridge, and the crate bars provided for this.
- The junction of the edge of the roof with the wall is made out by means of the same element as in the installation of valleys. In addition, to ensure waterproofing, the joint is treated with silicone sealant.
- A tong for ondulin is made out by using a special tong element Ondulin. It is bent and one edge is attached to the side waves of the extreme sheets, and the second edge is attached to the gable board. In extreme cases, a ridge element can be used when constructing a tong.
- When arranging roof ribs (roof slope joints), both ridge and gable Ondulin elements can be used.
- At the end roofing joints with ventilation and chimney pipes, as well as with walls, an Ondulin covering apron is used. The apron joint is waterproofed using silicone sealant. The fastening of the apron to the ondulin sheets is performed for each wave.
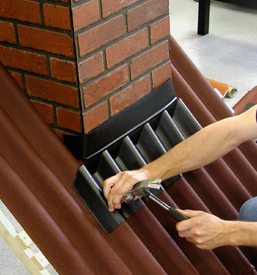
Installation of the covering apron Ondulin
- In order to provide access to the roof surface, as well as to illuminate the attic or attic space, a roof (dormer) window is provided. It is fastened with an overlap on the underlying roofing sheet, while the sheet located above is laid with an overlap over the window.
- When installing outlets for ventilation pipes (ducts) through the roof, special Ondulin outlets are used. The fastening of their base is carried out for each wave, and the top sheet is mounted with an overlap over this base.
Advice! To avoid gaps between the roofing sheets and the ridge elements, as well as on the cornice, a special Ondulin filler is used. The method of its application depends on the type of ventilation of a particular roof.
- If a metal crate is used when installing ondulin roofing, then the sheets are fastened to it with the help of self-tapping screws.
So, we have examined in detail the rules for laying euroslate, and now we hope that the ondulin installation technology will not become an insurmountable obstacle for you. We believe that with maximum effort, you will be able to achieve the desired result in the form of a strong, reliable and durable roof.
Did the article help you?