It would seem, what could be easier than hammering a nail? Even in the saying that characterizes a completely inept person, it says: "He cannot hammer a nail." However, even in such an elementary matter, certain nuances sometimes arise. For example, nails for ondulin should not be fixed at random. This will inevitably lead to rapid damage to the roof. How to do this in accordance with the technology - later in the article.
Mounting Features ondulin roofs associated with the nature of the material itself.
It consists of:
- Cellulose fibers
- bituminous impregnation
- Mineral fillers (including pigmenting ones)
- rubber
 In terms of composition, ondulin is very close to various rolled roofing materials. Its fixed wavy shape, reminiscent of slate, distinguishes it.
However, most of the properties inherent in bituminous materials are retained by this coating:
- Comparative softness ondulina
- Weak resistance to cutting and piercing influences
- Brittleness at low temperatures (installation, and even then - with special care can only be carried out up to -5 ° C)
- Softening at high (over +30 °C) temperatures
All this determines the requirements for fastening the coating. For him, use special nails or self-tapping screws for ondulin. However, professionals still advise to stay on the nails.
The sheet must be pressed with fasteners very accurately - without a gap, but the wave should not bend either (like most corrugated materials, fastening is carried out in the crest of the wave). This is quite difficult to achieve with a screwdriver.
In addition, the amount of work should be taken into account: each sheet of ondulin is attached in 20 places. It is easy to calculate that to cover, for example, a 3x9 building, taking into account the shaped elements, it will be necessary to tighten about half a thousand self-tapping screws.
By the way, the manufacturer also recommends using nails, and even supplies them in the kit when buying ondulin.
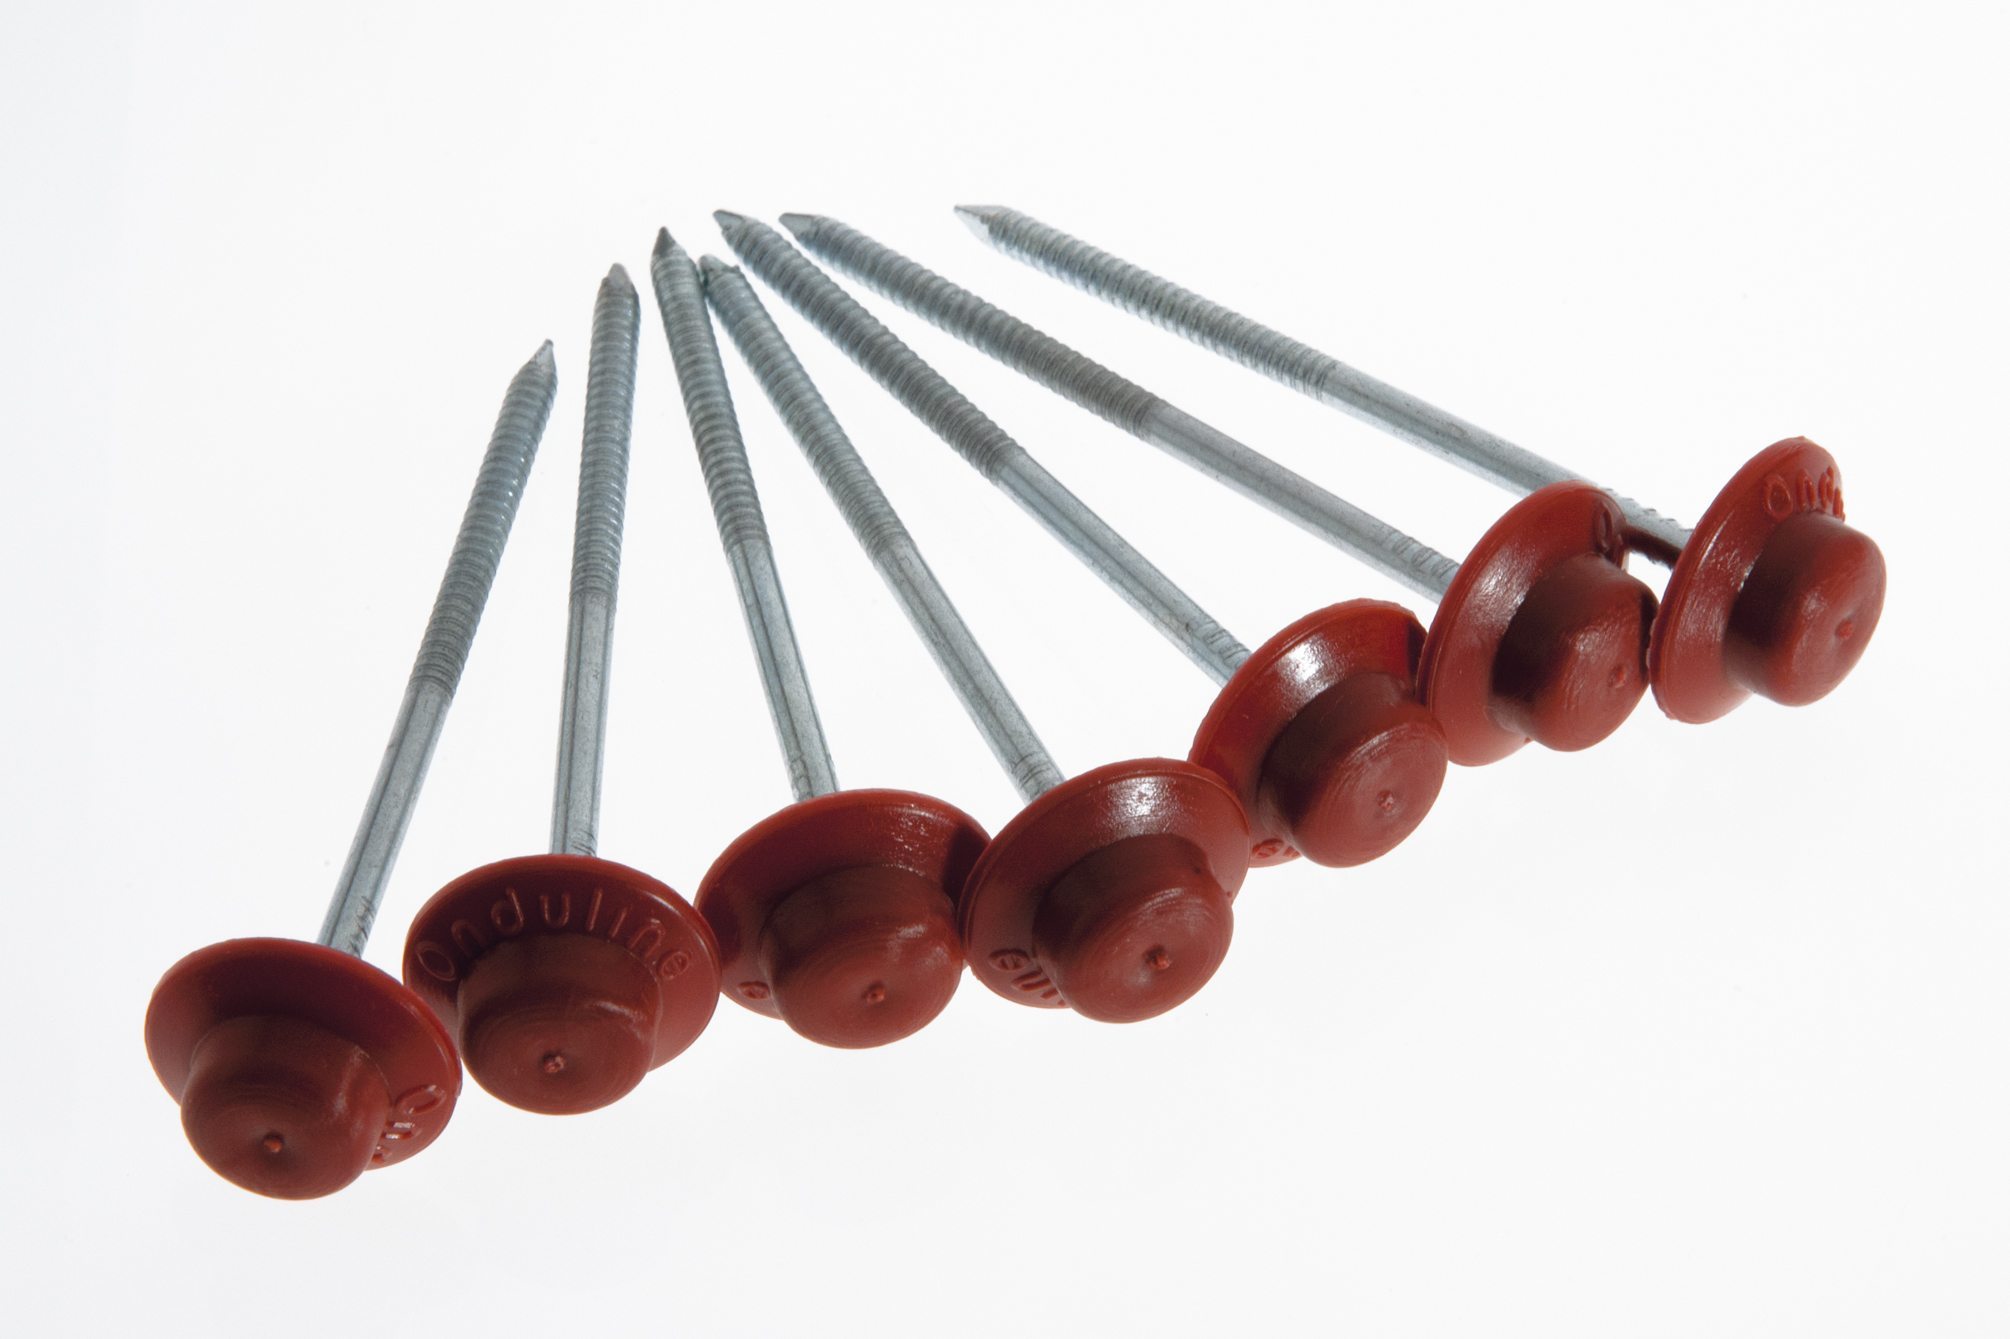
Regardless of whether used for fastening andulin roofing nails or self-tapping screws, a special plastic gasket with a lid is put on them.
According to technology, you must first hammer in a nail, or tighten a screw, and then close the lid. In practice, in the case of nails, often the caps are closed before hammering, since then it is not always easy to snap them into place.
True, with this method, some of the covers during the fastening process may deteriorate.
ADVICE! The ease of snapping the cover should be checked even before buying nails in the store.If it is difficult to close initially, it will almost certainly not be possible to clog it on the roof at all.
Why does a nail for ondulin need such a “clothes”? Since the material is soft, it requires elastic fastening of a relatively large area, otherwise the sheet may be torn by a gust of wind.
The gasket under the head of the nail is made slightly curved - this is conceived on purpose. So that she sits tightly on the bend of the ondulin wave. The top cover protects the metal from corrosion, which can cause the mount, and with it the roof, to fail.
In addition, the lids are available in several colors, which improves the aesthetics of the coating. The nails themselves are made of galvanized alloy steel, standard size is 70 or 75 mm in length, and 3.5 mm in diameter.
On the leg of the nail there is a brush that prevents it from being pulled out of the crate. And you should not save on their quality - for the reasons indicated above.
Important information! The problem of closing covers on hammered nails arises regularly. Experts do not recommend trying to close them at an outside temperature of +30 - the plastic expands, which prevents it from working normally. Even if the installation is carried out in the summer, it is better to wait until coolness sets in, and the problem will most likely be resolved.
There are also nails fixing ondulin of a simpler design. They have a safety plastic head on their hat. Naturally, in this case, the clogging is performed directly on it.
At the bottom, the plastic is bent in the same way as the washer in the nails with the cap.
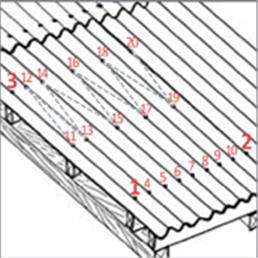
In addition to the already mentioned standard of 20 nails per sheet, the layout of the fasteners is also important:
- Each sheet must have at least 3 rows of crates.
- Installation is carried out from the overhang, and first 2 lower corners of the material are attached, then the upper one, on the side from which the installation is being carried out.
- The lower edge of each sheet is nailed into each wave, the remaining rows of fasteners are nailed into every second ridge.
ADVICE! Since unevenly located fasteners do not decorate the roof, it is recommended to stretch the rope along future nailing places before doing it. Alternative option: cut templates of the required length from ondulin scraps, and hammer nails into them.
During installation, it is not recommended, especially in hot weather, to move on an already installed coating. If necessary, special ladders should be used. In any case, it is strictly forbidden to step into the wave deflection.
Important information! If ondulin is purchased from an official dealer of the manufacturer, a guarantee is given for it. However, only those cases when the installation is carried out in strict accordance with the technology are recognized as warranty. If the scheme is violated, you can forget about compensation.
In general, there is no particular difficulty in accurately and correctly fastening ondulin to nails. But careless attitude to this process is unacceptable.
Indeed, because of such a seemingly trifle as a crookedly hammered nail, it may be necessary to repair the roof soon - and in the case of ondulin, this process is quite troublesome.
But high-quality fastening of sheets will allow you not to think about roofing for at least 15 years, as the manufacturer guarantees.
Did the article help you?