
If, when building a house, it seems to you that you “can’t pull” the second floor, but you want to get additional living space, a mansard roof can be the way out: you can build such a structure with your own hands at a relatively low cost. This task, of course, is more difficult than arranging an attic, but with a responsible approach, nothing is impossible.
We will consider the design features of mansard roofs, analyze what is needed for their construction, and also, step by step, we will analyze the algorithm for constructing the main components of the room.
- About mansard roofs
- Design features of the attic
- Main advantages of the solution
- What is required for work?
- Roof building materials
- Tools, fixtures and equipment of the master
- Work technology
- Step 1. Selecting a scheme and selecting parts
- Step 2. Roof truss system
- Step 3. Waterproofing, lathing and roofing
- Step 4. Thermal insulation and interior decoration of the attic
- Conclusion
About mansard roofs
Design features of the attic
Strictly speaking, the design of a mansard roof is not too different from the design of any other attic roof. The attic is a warmed and "ennobled" room under the slopes, which can be used as a full-fledged living room. This is achieved by making a number of changes to the construction scheme:

- Frame. If the entire space under the roof is used for the construction of the attic, then during the construction of the attic, part of the space under the slopes is cut off. At the same time, additional supports are erected inside, which not only increase the rigidity of the frame, but also act as the basis for cladding the walls of the resulting room.
The height of the supports may vary. When constructing a broken mansard roof, they are raised to a break, that is, the points of change in the angle of the rafters. If the attic is made under a gable or shed roof, then the height of the side wall may not exceed 1–1.2 m, and part of the ceiling is made inclined (parallel to the slope).
- 2222 Ceiling. There are two options here. For a sloping roof, the best solution would be to install a flat ceiling perpendicular to the walls - a small angle of slopes in the upper part of the roof allows this. In gable structures, the ceiling is made in the form of a trapezoid: a flat part in the middle and two slopes connecting it with low side walls. You can also completely abandon the ceiling by simply sheathing the slopes with boards or drywall to the point of their connection under the ridge.

- 3333Heat, hydro and vapor barrier. The device of the mansard roof of a private house must necessarily include all these works - otherwise the room will turn out to be unsuitable for permanent residence. Waterproofing is provided by a roofing pie (membrane + roofing material), thermal insulation is placed between the rafters, and vapor barrier is placed under the skin.


- 4444Finish. Since a significant part of the surfaces inside the attic is formed either by roof slopes or by internal supporting structures, these surfaces cannot be left unfinished. For a wooden house, lining is most often chosen; in buildings made of bricks or blocks, sheathing based on moisture-resistant drywall can also be used.
Main advantages of the solution
In terms of usability, a mansard roof is a great option for both compact cottages and fairly large houses.

The main advantages of attics:
- Additional living space. Everything is obvious here - we get one more (or more than one!) Room that can be used as an office, guest bedroom, etc. Depending on the quality of thermal insulation, the room can be made both summer and all-season.
- Save space on the main floor. The presence of an attic allows you to more rationally plan other rooms. So, for example, when moving the bedroom into the under-roof space, you can make a more spacious living room.

- 3333 Improving the microclimate. A warm room under the roof acts as a kind of buffer for air masses. At the same time, the attic will provide not only thermal insulation, but also the normalization of the humidity regime - if, of course, we properly equip the roofing pie.
- Saving money. On average, the price of materials for an attic device will be 30–60% lower than for the construction of a full-fledged second floor. Yes, the usable area will also be less, but if there is a question of budget optimization, this is quite a suitable option!

In fairness, it must be said about the shortcomings. All of them relate to the complexity of the attic device: if you work “in a slipshod manner”, then there is a risk of getting a cold room in which condensate will constantly collect.
What is required for work?
Roof building materials
The design of the roof of a house with an attic includes support bars-mauerlats on load-bearing walls, rafters resting on racks, a crate with a roof, as well as an interior finish with a heat-insulating layer. To assemble this entire system, we need building materials.
The basic list of materials for the attic roof:
| Illustration | Material group |
 | Lumber for the truss system:
|
 | Thermal insulation materials:
|
 | Roof membranes:
|
 | Roofing materials:
In addition to covering the roof slopes, you also need to purchase additional products - wind, cornice and ridge strips, valleys, adjoining strips, etc. |
 | Materials for interior decoration:
|
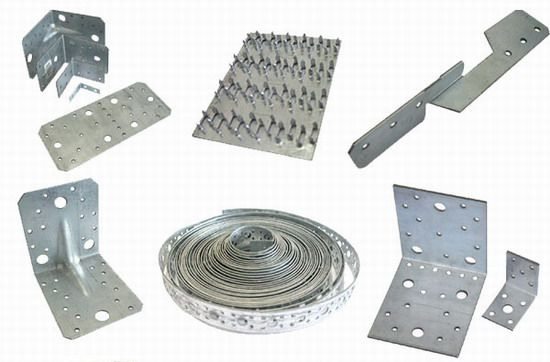 | Hardware:
|
| Liquid Formulations:
|
It must be borne in mind that the table provides an indicative list of products used. The final choice of materials is influenced by the design of the roof, the type of roofing, the features of the heat-insulating cake, and most importantly, the requirements for the attic itself.
Tools, fixtures and equipment of the master
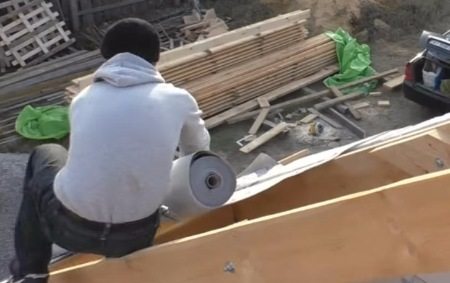
When building a mansard roof with your own hands, our main tool is an intelligent assistant. You will have to work with long and heavy parts, and even at a height, so it will be very inconvenient to work alone. So a second pair of hands definitely won't hurt.

But you can’t do without a mandatory set of tools. Will need:
- Wood saws (one for working with large parts, the other for fitting in place).
- Drill with drills of different diameters.
- Screwdriver (one per master).
- Levels (laser and water).
- Roulettes and plumb lines.
- Carpenter's ax (it is very convenient to cut grooves at the place where the rafter legs are attached to the Mauerlat and on other details).
- Brushes or sprayers for waterproofing and antiseptic work.
Required equipment:

- Ladders for ascent and descent.
- Scaffolding and scaffolding for work along the eaves.
- Mounted ladders with ridge fastening for moving along roof slopes.
- Fall protection systems.
- Light ladders that we will use when working inside the attic.

As for the equipment of the masters, the necessary minimum is comfortable shoes, gloves and durable overalls, plus goggles and a respirator when performing “dusty” operations.
A helmet is highly desirable: yes, it’s uncomfortable, yes, it’s hard - but it hasn’t yet arrived with a hammer dropped by a colleague.
Work technology
Step 1. Selecting a scheme and selecting parts

Mansard roof arrangement can be different and it is determined either by our wishes or by the type of roof laid down in the project.
The most commonly used options are:

- Double roof. In this case, the rafters along the entire length have the same slope, and are fixed only in the upper part on the ridge beam. The option with a central run is also suitable, but in this case the attic will be divided by a central wall into two separate rooms.
- Broken roof. The lower parts of the rafters before the break have one slope, the upper parts have another (usually smaller). Each truss truss rests on a pair of racks that simultaneously serve as a wall frame.This structure of the structure provides more internal space, but at the same time it is more difficult to design and install a sloping roof.

This section provides diagrams and illustrations that will give you an idea of the configuration of both types of roofs.
Now - a few words about the calculations. Mansard roof rafters, as well as other supporting elements, experience serious operational loads, so they need to be made with a good margin of safety. On the other hand, thick parts are more expensive and put an increased load on the supporting structures. Therefore, you need to look for the "golden mean".

Most often, the calculation of the truss system for the roof (any, not only the attic) is performed using calculator programs. I suggest using the typical signs given in the table below:
| Parameter | Meaning |
| The angle of the rafters at the bottom of the sloping roof | up to 60 degrees |
| The angle of the rafters at the top of the sloping roof | up to 40 degrees |
| Rafter leg length for sloping roof | up to 4 m |
| Rafter leg length for gable roof | up to 6 m |
| Upright Height | 2.3–2.7 m |
| Optimal rafter pitch | from 0.6 to 1.2 m |
| Minimum rafter cross section (pine) | 50 x 150 mm |
| Optimal batten spacing | 35 cm |

These values are indicative and calculated for regions with a snow load of 180 kg/m2. In regions with higher snow load or higher wind pressure, thicker rafters should be used.
Step 2. Roof truss system
When all the calculations are completed, you can proceed to the construction of the roof frame, under which there will be an attic. I will give an example of the construction of a roof with two different slopes:
We start with the installation of the truss structure:
| Illustration | Stage of work |
 | Mauerlat installation. Along the perimeter on the load-bearing walls, we install a support beam with a section of 150x150 mm - Mauerlat. For fixing, we use threaded steel studs embedded in the masonry. When taking out the edges of the roof outside the building, an additional beam can be attached to the edges of the floor beams protruding beyond the walls. |
 | Rack installation.
When building a roof with different slopes, one of the vertical walls of the attic will run along the outer edge of the wall. For its erection at the corners, we install racks, align them and reinforce them with struts. |
 | Run installation.
We connect the upper edges of the corner posts with a horizontal purlin. We strengthen the structure with intermediate vertical supports. We select the pitch of the supports in accordance with the selected pitch of the rafters. We fix each support in the lower part with corner plates. To increase reliability, the same lining can also be used when attaching racks to the run. |
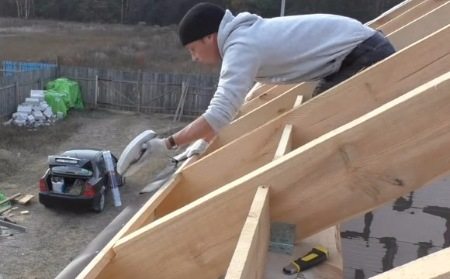
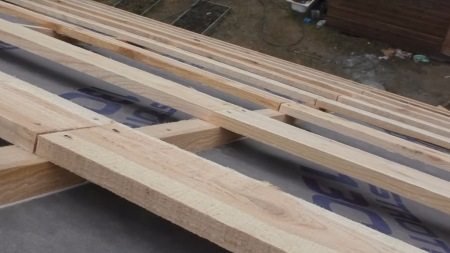
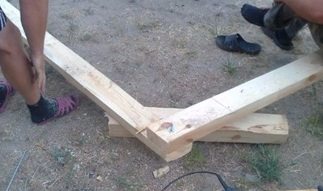 | Production of roof trusses.
From a timber treated with antiseptics, we cut out the rafter legs of the desired size. We cut the edges of the legs or make cuts for mounting on the Mauerlat. In the upper part, we connect the truss truss with a bolt with a wide washer. We fix the legs with nails or self-tapping screws for the selected angle of inclination of the slopes, using a template. |
 | Installation of roof trusses.
We raise structures to the roof and mount them, connecting them with load-bearing elements. In our case, one side of the truss truss will be based on the Mauerlat, and the other side will be based on the run, fixed on vertical posts. We fix the legs of the rafters with nails, additionally reinforcing the attachment point with metal corner plates. |
 | Rack installation.
At a distance determined by the project, we install vertical posts under each roof truss. They will not only provide an increase in structural rigidity, but will also become the basis for the formation of attic walls. We attach each rack in the lower part to a floor beam or Mauerlat, and in the upper part to the corresponding rafter leg. |
 | Mounting the top ties.
In the upper part, we reinforce the truss trusses with transverse puffs. We fix each puff to the rafter legs with a pair of bolts, reinforcing the fastening with wide washers. |
 | Seal of gables.
We carry out the installation of the pediment parts:
|
 | Completion of work. After completing the main work on the truss system, we re-treat all wooden parts with an antiseptic. Also at this stage, it is possible to strengthen the structure with transverse and diagonal supports. After that, we remove the temporary braces and puffs that we installed at the installation stage. |
It should be borne in mind that the stage of erection of the truss frame is the most responsible and most difficult.For a broken, hip and gable roof, the truss systems will be very different, so it is very important for us to choose the best option and implement it taking into account the strength requirements.
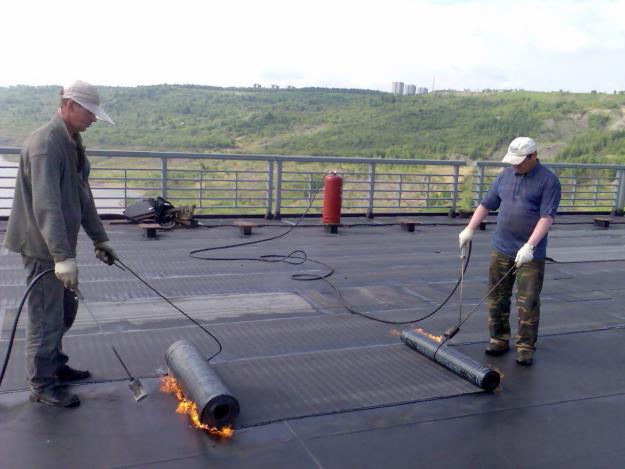
Step 3. Waterproofing, lathing and roofing
The next stage of construction is the assembly of the “roofing cake” with a waterproofing layer, the installation of the crate and the installation of the roofing material itself.
We perform roofing work on the mansard roof as follows:
| Illustration | Stage of work |
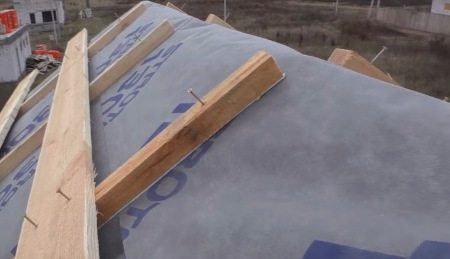
 | Installation of sealing tape. Glue sealing tape along the lower edge of the roof overhang and at the ends. It will ensure a snug fit of the waterproofing material to the truss system. |
| Waterproofing attachment.
We roll out the roofing waterproofing membrane horizontally, starting from the bottom of the slope. We lay the rolls with an overlap, so that the top one overlaps the bottom one by 150–200 mm. We fix the membrane on the rafters with galvanized steel brackets. |
 | Installation of the counter-lattice.
To increase the reliability of waterproofing and more efficient ventilation of the under-roof space, we make a counter-lattice. Laths with a section of 30x30 or 40x40 mm are stuffed onto the rafters over the waterproofing layer. If possible, the lower part of the waterproofing strip can be glued with sealing tape - this way we will protect the membrane from damage when it comes into contact with the wood. |
 | Lathing installation.
On top of the counter-lattice we fill the boards running across the rafters - the crate. The step of the lathing is determined by the type of roofing material used, but it is usually done within 300–400 mm. The edges of the boards used for the construction of the crate are joined only on the rafters. At the same time, we fasten each edge of the board with at least two nails. When laying a soft roof, we mount the crate from plywood boards.The optimal gap between the elements is 8–10 mm, which will compensate for material deformations when temperature and humidity change. |
 | Ridge waterproofing.
We lay a whole roll of waterproofing material on top of the ridge. In this case, the edges should go on the slopes of at least 400 mm on each side. We fix the waterproofing to the rafters and stuff the reinforced counter-lattice on top. We also mount the crate with a smaller step. |
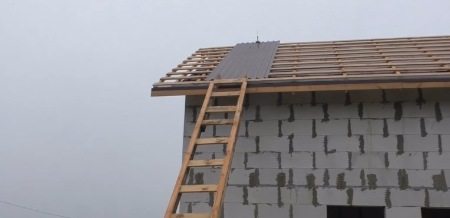 | Lifting roofing material.
We raise the roofing material to the roof. To do this, we use ladders and special scaffolding. They must be attached to the wall, fixed and used as a support for moving large-format sheets (slate, metal tiles, corrugated board). |
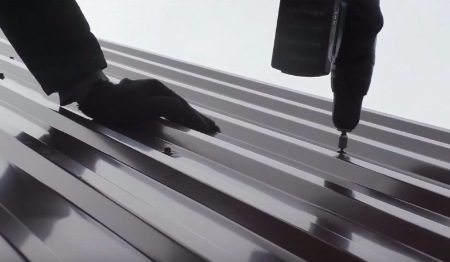 | Fixing roofing material.
The roofing material is laid on top of the crate and fixed to it using mechanical fasteners. As a rule, installation begins from the lower edge of the roof - this allows you to overlap and avoid precipitation. And corrugated board, and slate, and metal tiles are laid with an overlap of side waves. We also lay out soft roofing materials on the crate, but we mount it in a double way. First, we fix it on the lei, and then with the help of mechanical fasteners (staples, nails). |
By and large, a mansard roof is covered in the same way as any other. The only difference is the increased requirements for waterproofing: after all, under the roof there will be not an attic, but an insulated living space.
Step 4. Thermal insulation and interior decoration of the attic
In order for us to be in the attic room with maximum comfort, it needs to be insulated. The capital parts and gables are thermally insulated in the same way as the rest of the walls of the building.But with the slopes of the roof and the ceiling (if we do it separately) we will have to tinker.
The interior decoration of the attic room is carried out according to the following algorithm:
| Illustration | Stage of work |
 | Preparation of thermal insulation material. Rolls of mineral wool with a thickness of 100 mm or more are cut into fragments, the width of which is 2-3 cm more than the step between the rafters. This will allow you to lay the material with minimal compaction - the insulation will hold on, but will not lose its effectiveness. To ensure sufficient thermal insulation of the slopes, it is desirable to lay at least two layers of mineral wool, 100 mm each. |
 | Lathing installation.
From the underside of the rafters, we fill the inner crate in increments of about 50 cm. It performs two functions: it fixes the insulation and serves as the main one for the sheathing. |
 | Laying thermal insulation between the rafters.
In the gaps between the rafters, we lay the heat-insulating material, placing it without gaps and voids. If a vapor-permeable membrane was used for waterproofing the roof, we put the insulation close to its surface. When waterproofing with a film, leave a gap of at least 30 mm for condensate to escape. |
 | Fixing the insulation with a thread.
Thermal insulation can sag under its own weight, especially on inclined and horizontal sections. To eliminate the sag, we stretch the nylon cords, with which we press the heat-insulating material. |
 | Laying the inner layer of thermal insulation.
To increase the efficiency of insulation, the inner layer of thermal insulation can be made from a material based on an acrylic binder. Such heaters do not contain phenols, therefore it is desirable to use them for internal insulation. We place the heat-insulating layer between the bars of the crate and fix it with a thread. |
 | Wall joint seal.
We waterproof the place where the roof adjoins the capital structures by treating the masonry with a penetrating primer. In the gap between the Mauerlat and the wall, we lay a sealant made of foamed polyethylene, which will protect the assembly from blowing. |
 | Installation of communications.
We attach wiring to the elements of the roof frame to illuminate the attic. To avoid fire, all wires are laid in non-flammable cable channels and carefully insulated. |
 | Installation of vapor barrier film.
On top of the insulation, we attach a vapor barrier film to the battens and rafters. It will protect the thermal insulation from moisture and condensation. We lay the bar tightly, fixing it on wooden bars with brackets. |
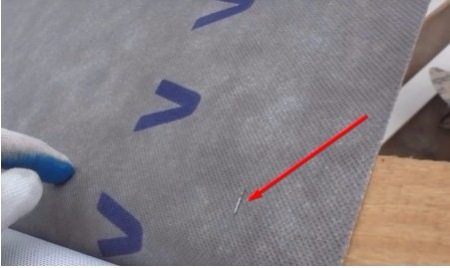
 | Gluing the joints of the vapor barrier.
For the most effective protection against wetting, the webs of the vapor barrier film are overlapped. The joints must be glued with reinforced tape. |
 | Room upholstery.
On top of the vapor barrier film, we mount the lining of gypsum boards, OSB, chipboard or lining. We attach the material either to the bars of the crate, or to the counter-crate, which can be installed on top of the vapor barrier. |

The work, of course, does not end there. It is necessary to tidy up the sheathed room, complete the laying of communications, equip a staircase to the attic, and possibly connect the attic room to the attic. But still, the most difficult stage is already behind us, and we have at our disposal a fairly warm room under the slopes of the roof.
Conclusion
The mansard roof must be strong and reliable, but besides this, when designing and building it, it is necessary to take into account the need for insulation, hydro and vapor barrier.In general, the work ahead is quite painstaking, and the video in this article, as well as the advice of professionals, will help you cope with it. You can get them by asking a question in the comments.
Did the article help you?