Today we will figure out how to choose a roofing metal profile and make a reliable and durable roof. Follow all the recommendations outlined in the review, and you will be able to do the work no worse than professional builders.


Everything you need to know about corrugated board
If you do the work yourself, then in addition to the installation itself, you will have to perform a number of other actions: surface preparation, construction of the crate, purchase of materials and calculation of their quantity. We will break the whole process into separate stages and consider them in the order of execution.

Measurements and calculations
Before proceeding with any actions, it is necessary to carry out a number of preparatory activities:
| Illustrations | Description of works |
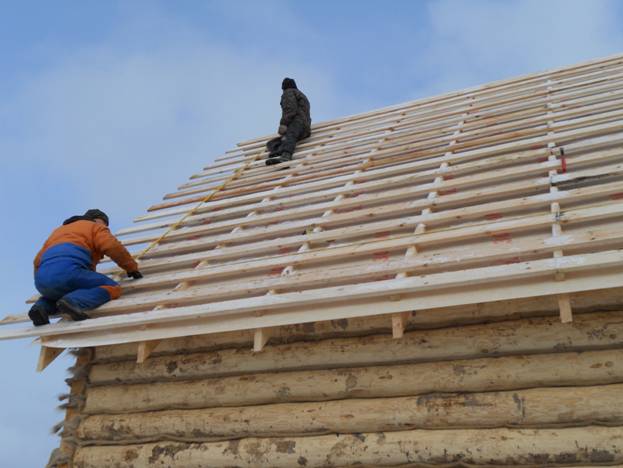 | Measure the height and width of each slope. To work, you need a tape measure of sufficient length and an assistant. You should not rely on information from the project, the actual indicators often differ from those indicated in the plan. |
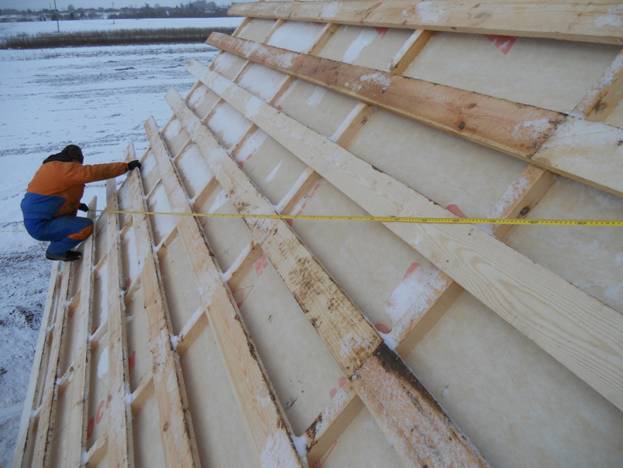 | Diagonals are measured. This is necessary in order to find out if the slopes are even and if there is a violation of the geometry in the roof structure. The diagonals must match, if there are discrepancies, all problems must be eliminated before work begins. |
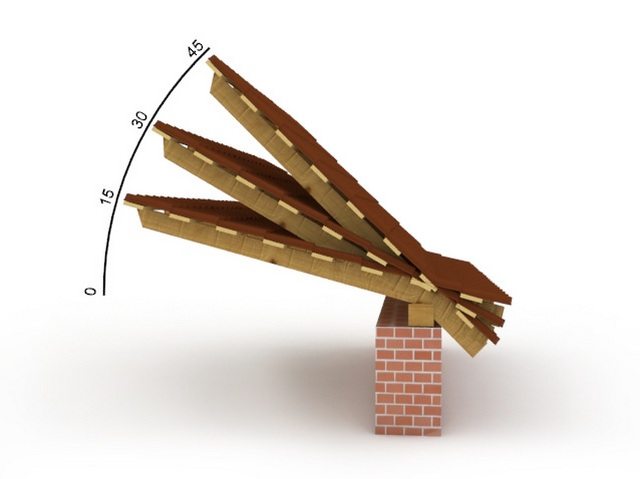 | The slope of the roof is determined. This is a very important aspect, since the calculation of the necessary materials and the design of the base to be made depend on it.
Measurements do not require absolute accuracy, you must determine which gap from the diagram your roof belongs to. |
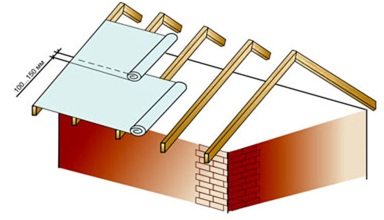
 | The approximate amount of materials is calculated. With a slope of less than 15 degrees, a continuous flooring is made, on which the crate is stuffed in increments of 300 mm, if the slope is greater, then the crate pitch can be from 450 to 600 mm.
If you have overlapping sheets, then do not forget about the margin for joints, they are large enough. Waterproofing is laid under all types of structures, when calculating it, take into account an overlap of 100 mm at the joints. |
If it is possible to close the entire slope in one piece, then it is better to do just that.Although it is less convenient to lift long elements, the roof is much more reliable and durable.

Required materials and tools
First, let's figure out how to choose and calculate a metal profile.
Here you should be guided by the following recommendations:
- Sheet length. It should be 50 mm longer than the length of the slope so that there is a slight overhang. As for the overlaps on the joints, on roofs with a slope of up to 15 degrees this figure is 300 mm, with a slope of 15 to 30 degrees - 150-300 mm, with a slope of more than 30 degrees, the overlap should be 100-150 mm;
- Sheet width. It is worth remembering that a corrugated sheet has two sizes: actual and useful width. Actual - these are the real parameters of the element, useful - the width that closes when the sheets are joined. It’s easy to understand here: the useful size is always 50 mm smaller than the real one;

- wave height. For roofing, it is best to choose options with a wave height of 10 mm or more. The most popular are profiles from 20 to 45 mm, they look good and have high strength;

- Manufacturer. Choose products from well-known companies that are well known in the market. No need to try to save money by buying products of unknown origin. The price may not be much lower, but the quality differs very much, I have met a professional sheet many times, which begins to rust in a year or two due to incorrect manufacturing technology and savings on the quality of the coating;

- Color. This aspect is not related to quality, but it greatly affects the appearance of the house. The roof should be combined with the facade, so choose the shade that best suits the overall design, and will not look foreign;

- Material thickness. A very important criterion on which the strength and durability of the roof depends. There are a lot of products on the market made of sheet with a thickness of 0.4-0.45 mm, they are inexpensive, but they also have the appropriate quality. I recommend purchasing options made of metal no thinner than 0.5 mm, but in general, be guided by the principle "the thicker the better."

In addition to corrugated board, other materials are also needed, their list is as follows:
- OSB sheets. They are necessary if the angle of inclination of the roof is less than 15 degrees to create a continuous flooring along rafter designs. If the slope is greater, then this material is not needed;

- Anti-condensation film. It is laid under corrugated board and prevents the formation of condensate, which is very important, because metal surfaces begin to rust with constant contact with moisture. Usually the material is sold in rolls of 75 square meters, when buying, do not forget about the overlap at the joints, which should be at least 100 mm;

- Board 25x100 mm. It is used for the construction of crates for corrugated board. You can use thicker options, but thinner ones are not worth it because of their low strength;

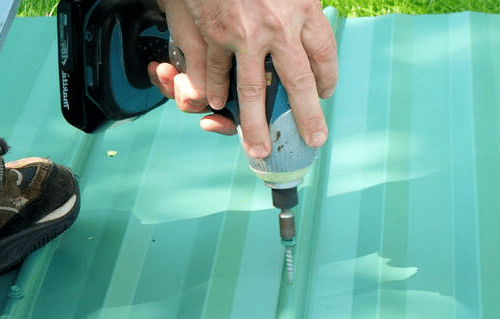
- Fasteners. The film is fastened using construction brackets. The crate is fixed with wood screws, and the profiled sheet is fixed with roofing screws. This type of product is painted in the same color as the base material and has a washer with a rubber gasket to reliably protect the holes from moisture;

- Ridge and end elements. To close the ridge and the junction with the gables, special products are used. It is worth choosing extras of the same colors, which is the main material.

To work, you need the following tool:
- screwdriver. It is used to drive self-tapping screws. For conventional fasteners, a PH2 nozzle is needed, and for roofing, a M8 hexagonal nozzle is used;

- Metal shears. Can be used both electric and manual. It is better to choose a tool for curly cutting so that the handles are located above the plane of the material, so it will be more convenient for you to work;

In no case do not cut the corrugated board with a grinder. From this, the edges overheat, and the ends begin to rust in a short time.
- Construction stapler. With its help, the fastening of the membrane material will be quick, and the quality of work will be high;
- Hacksaw. With its help, the elements of the crate are cut.
How to carry out work
Installation of a roof from a metal profile is carried out according to a certain scheme. The work instructions look like this:
| Illustrations | Description of works |
 | Vapor barrier attached.
|
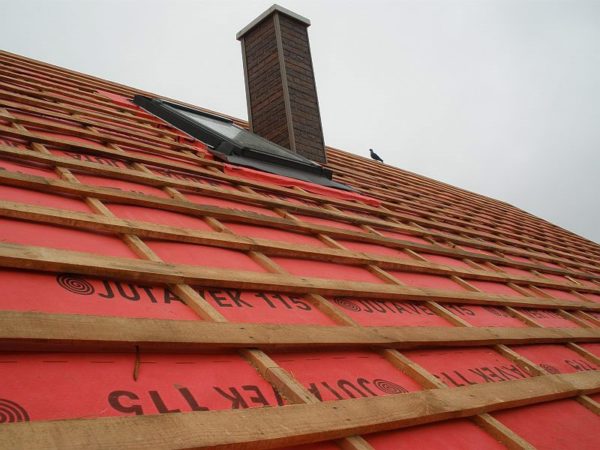 | The crate is attached. It can be fixed directly to the rafters, or you can fix a counter-lattice bar to create a ventilation gap.
|
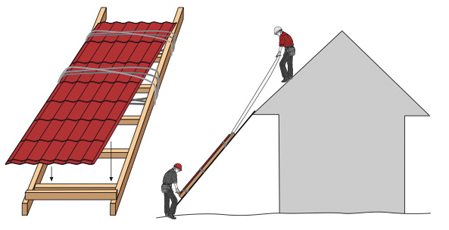 | The material rises. The metal profile on the roof must be raised so as not to damage the sheets. For this:
|
 | Fastening is made. The profiled sheet is exposed on the roof, remember that the material should protrude 30-50 mm on the overhang.
|
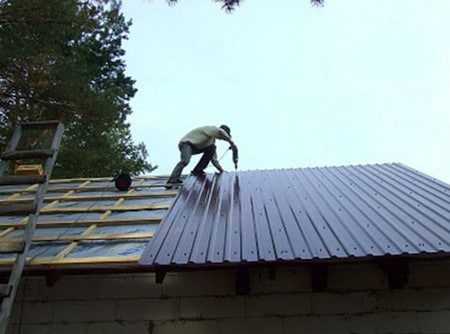 | Final fixing of sheets. Top and bottom screws are twisted into each wave. In the middle, they are located through the wave with a step of 50 cm and are screwed according to the location of the crate. |
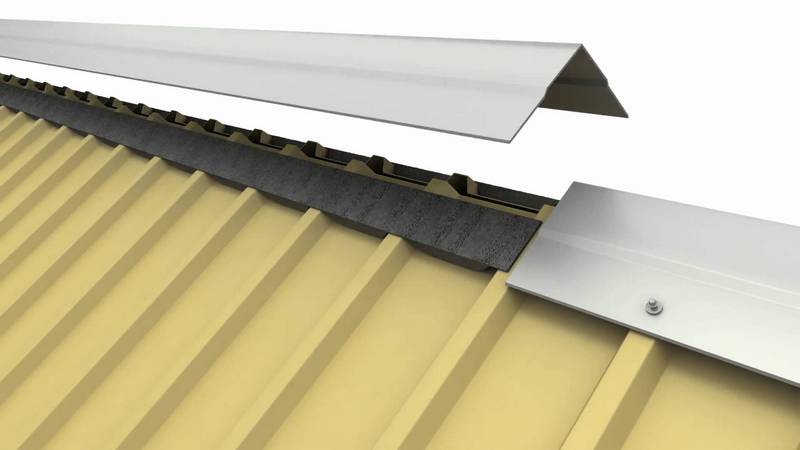 | The horse is attached.
|
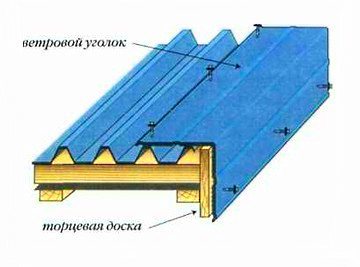 | Attached wind deflector. Elements are placed from the bottom up and fastened on both sides - both to the end board and to the corrugated board. Moreover, you need to screw the fasteners into the profiled sheet through the top of the wave to ensure reliability. Mounting step - 25-30 centimeters. |
If you are changing the coating, then before you cover the roof, you need to remove the old roof, this stage is carried out before starting work so that precipitation does not damage the structure.

Conclusion
This article will help you choose high-quality material and carry out work without the involvement of specialists. The video in this article will visually show the important points of the workflow, helping to understand the topic even better. If you still have questions - write them in the comments.
Did the article help you?