At the end of the roof truss system, the question of how to lay the metal tile becomes relevant. To begin with, it is recommended to make control measurements of the slopes, since slight deviations from the design values are possible during the construction process.
It is necessary to check for flatness and squareness of the roof by measuring the diagonals of the slopes. Insignificant defects in the rectangularity of the base can be hidden from the ends with additional elements.
The main size that determines the length of the sheets of metal is the width of the slope (from the eaves to the ridge). It is determined taking into account the overhang of the metal tile sheet from the roofing eaves by 40 mm.
 If the width of the slope is more than 6-7 m, the sheets are broken into 2 or more pieces, overlapping 150 mm.Roofing from long sheets will have fewer joints, however, working with long sheets is less convenient than with shorter ones.
With daily temperature fluctuations, condensation forms on the inner surface of such a roof. In addition, the evaporation that rises from the interior of the dwelling is converted into water under the influence of the cold air of the under-roof space.
Excess moisture leads to wetting of the insulation and, as a result, the loss of its thermal characteristics, the formation of ice, freezing of the roof, rotting of the crate and rafters, dampness and mold, damage to the attic and interior finishes.
To avoid all this, before laying the metal tile, thermal insulation of sufficient thickness is laid and it is protected from condensate from the side of the tile flooring with a waterproofing film, and from the side of the premises - with a vapor barrier film.
To remove moisture from the space under the roof, natural ventilation is arranged in such a way as to ensure unhindered passage of air to the ridge from the eaves.
For this purpose, between the waterproofing and the metal tile, with the help of a counter-lattice and a crate, a ventilation gap is arranged with a height of approximately 40-50 mm.
When filing roof overhangs provide slots 50 mm wide, while special holes are released in the ridge seal.
Waterproofing device
When installing waterproofing, special membrane-type films are used, the principle of which is to prevent the penetration of moisture into the insulation from the side of the roofing and the ability to pass moist air from the interior into the ventilation gap.
Rolls of waterproofing film are rolled horizontally along the rafters, starting from the eaves and providing a sag of 20 mm. The panels are laid with an overlap of 150mm.
We mentioned the device of insulation and vapor barrier in one of our previous articles, so we will immediately move on to the device of the base for the metal tile - the crate.
Lathing installation
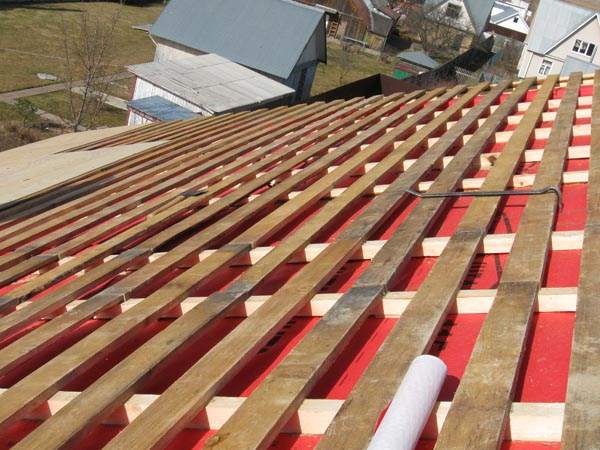
On the question of how to properly lay the metal tile, you can say with confidence - with the help of high-quality and reliable crates. The rules for installing the crate are as follows:
- crate they are made of antiseptic-treated beams of approximately 50 * 50 mm with a section or boards with a section of 32 * 100 mm.
- First, over the waterproofing, 50 * 50 mm counter-lattices are nailed to the rafters along their length, after which the battens (boards) of the battens are attached to them.
- The first batten from the cornice is selected 10-15 mm thicker than the others.
- The step from the beginning of the first beam of the crate to the middle of the second should be 300-350 mm, depending on the type of tile.
- The step along the axes of the remaining bars is arranged equal to 350-400 mm, again starting from the type of tile.
- With a distance between the rafters of more than 1000 mm, larger bars are used.
- Around roof windows, chimneys, in valleys, etc., the crate is made solid.
- Two additional beams are nailed on each side of the ridge bar.
- The end strips are raised above the general level of the crate by the height of the wave (profile) of the metal tile.
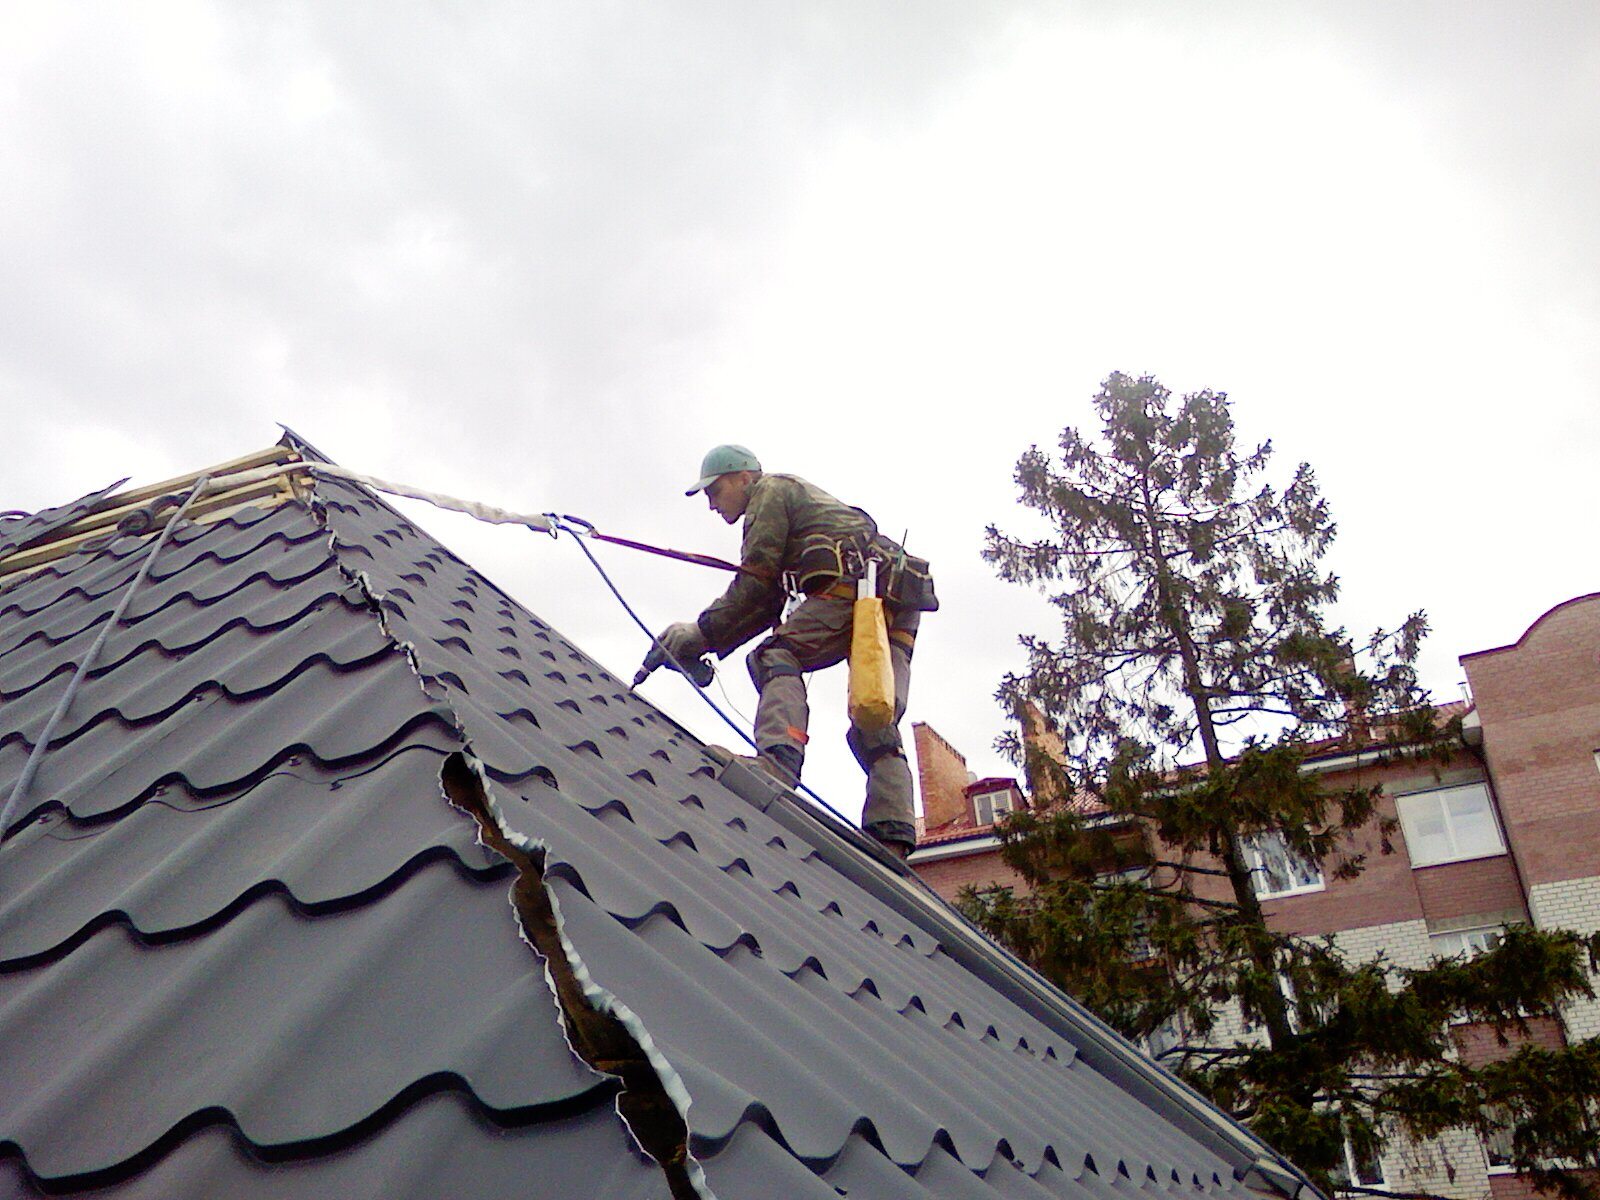
Advice! Move along the roof of a metal tile strictly in soft shoes, while stepping into the deflection of the wave. In addition, the installer must be provided with means of insurance and protection.
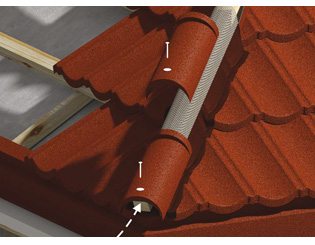
Valley device
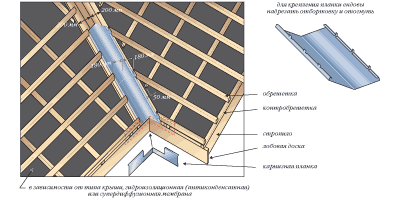
In places of internal joints of the roof, a bar of the lower valley is attached to a continuous crate with the help of self-tapping screws. When joining the planks, an overlap of 100-150 mm is provided, depending on the angle of the roof.
Next, sheets of metal tiles are mounted, which have undergone appropriate marking and trimming. On top of the joint of sheets, which in itself has an unsightly appearance, a decorative element is laid - the bar of the upper valley.
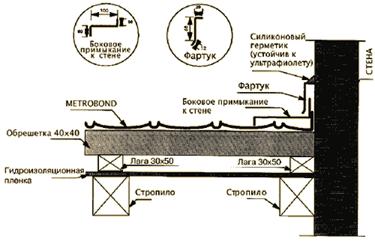
Installation of metal tiles at the junctions
In order to ensure the tightness of the adjoining of the metal roofing to the walls on the slope, chimneys, etc. elements arrange an inner apron:
- For its manufacture, the lower junction bars are used. They are applied to the walls of a vertical barrier and a mark is made on it of the upper edge of the bar.
- Next, they pierce the strobe with the help of a grinder along the intended line. At the end of the process, dust is removed and the strobe is washed with water.
- The inner apron begins to be mounted from the bottom wall of the barrier. The lower junction bar is to be cut in place, mounted and fixed with self-tapping screws.
- Similarly, the apron is installed on the remaining walls, while not forgetting to provide overlaps of the order of 150 mm to eliminate the possibility of leaks.
- The edge of the bar, which is inserted into the strobe, is sealed, after which a tie is wound under the lower edge of the inner apron - a flat sheet that is designed to drain water.It is directed down to the roof eaves or into the valley. With the help of pliers and a hammer, a rim is made along the edge of the tie.
- Above the tie and inner apron, metal sheets are installed.
- Upon completion of the installation of the roof covering around the vertical barrier, they proceed to the implementation and installation of an external decorative apron, consisting of the upper adjoining strips. The apron is mounted similarly to the internal one, however, its upper edge is not inserted into the strobe, being fixed directly to the wall.
The device of a roofing flooring from sheets of a metal tile
Now consider how to properly lay the metal tile:
- The first sheet of coating is aligned along the end of the roof and fixed at the ridge with one self-tapping screw. The removal of the sheet in this case relative to the eaves is provided equal to 40 mm.
- The next sheet is overlapped on the first sheet when installing the roof from right to left, or the edge of the second sheet is placed under the edge of the first sheet when installing from left to right.
- In the upper part of the overlap, the sheets are connected with self-tapping screws without fastening to the crate in such a way that they can turn together relative to the self-tapping screw, which holds the first sheet near the roof ridge.
- The third sheet is laid by analogy with the second. All 3 sheets that are fastened together must be aligned parallel to the eaves.
Advice! If there is a protective film on the purchased metal tile, it must be removed without fail.
- Docking of sheets along the length (if necessary) is carried out by laying first two extreme sheets of the lower row, and then above them two sheets of the upper row. In this case, the connection and alignment is performed along the end of the roof.
- The bottom of the sheets of metal tiles is attached with screws through one wave to the bottom of the wave. Subsequent rows of self-tapping screws are screwed in a checkerboard pattern through one wave.
- On the side overlap, the tile sheets are fastened with self-tapping screws along the crests of each of the waves. For each square meter of the roof, 6-8 self-tapping screws should go.
The most complete illustration of how to lay a metal tile - video, is located at the end of this article.
Fastening additional roofing elements
- The gutter holders are installed on the bottom rail of the purlin according to the installation instructions supplied with the elements of the gutter system. When fastening the holders, it should be noted that the edge of the gutter must be located 25-30 mm below the edge of the roof deck. This is required to prevent damage to the gutters when snow layers leave the roof.
- When installing a gutter system with a rectangular cross section, the gutter is inserted and fixed in holders. Next, a cornice-type plank is attached to the crate, and the edge of the gutter should overlap with the bottom edge of the plank. The waterproofing underlay film must be laid over the cornice strip in order to ensure that condensate drains from the film into the gutter.
- When installing a gutter system with a circular cross section, the gutter is inserted and fixed in the holders, while leading the edge of the gutter into the fixing protrusion of the holder. A cornice-type plank is attached to the crate so that its lower edge overlaps the edge of the gutter. The roofing waterproofing film is removed in the same way as in the previous case.
- At the ends of the roof, end strips are fastened.They are attached in increments of 500-600 mm using self-tapping screws. An overlap of 50 mm is provided between the planks. The slats can be trimmed as needed.
- Next, arrange the ridge trims. They come in two types: round and flat. The installation of a round ridge strip begins with fastening with self-tapping screws or rivets of conical or flat plugs along its ends (depending on the shape of the roof). For flat ridge battens, plugs are not used.
A curly seal must also be laid on the ridge, on which the ventilation holes are previously released. It is on him that the ridge strip is mounted, which is then fixed with special self-tapping screws 80 mm long on every second wave of the metal tile. An overlap of 100 mm is performed between the ridge slats.
Roof railing installation
In order to ensure safe movement on the roof during maintenance, a vertical grate is fixed at the level of the eaves. roof railings. The crate under it is made solid.
The fence supports are fixed with galvanized screws 8 * 60 in the places of metal tile wave deflections through a rubber gasket, the roof sheet into the support beam.
The support is adjusted according to the angle of the roof. The pitch between the supports is 900 mm. After fixing the supports, a fence is hung on them. At the junction points of the supports with the sections of the fence, holes are drilled in the upper and lower crossbars of the section, as well as in the support.
Through these holes, the sections are fastened to the supports using bolts.The holes of the upper crossbar are plugged with polyethylene plugs, and upon completion of the installation, the junction points of the sections are subject to sealing.
Snow guard installation
To avoid avalanche snow from the roof, provide for the installation of a special snow holder:
- The crate under it is made solid, while the distance between the brackets serving as supports is 1000 mm. The distance to the ends of the snow guard is 500 mm.
- Mount the device in the same way as installing a roof fence.
- The snow guard is installed approximately 350 mm from the roof eaves.
- With a slope width of more than 8 m, an additional snow holder is installed. In addition, their installation is mandatory above the skylights.
Advice! As a more economical option, only a snow holder bar can be used, which is fixed through one wave with the help of ridge screws to the crate together with a reinforcing bar. The lower edge of the fixture is attached to the sheets of metal with ordinary self-tapping screws.
We examined the process of becoming a metal roofing deck in detail. If you need a more visual representation of the performance of this type of work, then a thematic video can help you: how to lay a metal tile.
Did the article help you?