The drainage system in the architecture of the building occupies an important place. Its main task is to collect water that flows down from the roof slopes. The competent device of drains prevents destruction of walls, a facade, the base of the building. In addition, the gutter is an element of the decorative design of the house. This article presents the basic rules for attaching a gutter system to a pitched roof.
External drainage system
 Modern manufacturers offer a wide classification of drains:
- organization drainage from the roof- external and internal;
- according to the composition of raw materials - polymer and metal;
- according to the method of connecting components - an adhesive system or on rubber seals.
The internal drainage system, as a rule, is organized on flat roofs. Today we will tell you how to equip an external drain, used on roofs with a slope of more than 15 degrees.
outdoor roof drainage system each manufacturer has its own installation features specified in the instructions for it. But for each drainage system there are general installation rules, which we focus on in our article.
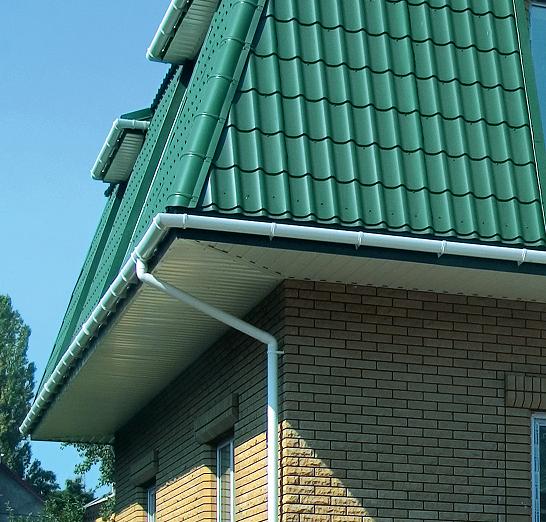
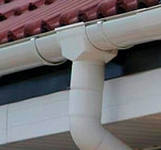
The external drain consists of the following main elements:
- gutter (maximum slope of at least 2 degrees);
- water intake funnel;
- drainpipe.
Water from the slope is directed to the gutter, then to the intake funnel and downpipe.
Attention. Funnels are located at a distance of 15-20 m from each other. The length of the gutter per funnel should not exceed 10 m.
Outdoor gutters
Starting the device of the drainage system, it is necessary to determine the type of its constituent elements. For drainage, you can use:
- cornice gutters, which are installed along the eaves;
- parapet gutters located between the parapet walls. This type of gutter is quite rare. They are made of metal or a recess with a bituminous coating is arranged on the roof. Water through such a gutter enters the spillway;
- gutter gutters help channel water into parapet or cornice gutters. They are installed at the junction of the roof slopes.
If you are thinking about how to make a gutter with your own hands, then you should pay attention to the shape of the gutter:
- semicircular;
- square;
- embossed.
Most often, semicircular gutters are used in the drainage device. The relief form is used on certain forms of the structure, it helps to protect the drain part of the gutter from debris and leaves.
Advice. In regions with high rainfall, it is recommended to use square gutters, as they have good flow capacity due to the large cross-sectional area.
Outdoor drain pipes
Do-it-yourself installation of gutters involves the use of downpipes of various sections:
- round;
- square.
It is recommended to place downpipes on the sunny side of the building, their shape should match the shape of the gutter. With a roof area of more than 200 square meters, it is better to use pipes with a square section.
Outdoor drainpipes - GOST defines their dimensions for use on roofs with different areas:
- on the roof 30 sq.m - pipe diameter 80mm;
- on the roof 50 sq.m - pipe diameter 90mm;
- on a roof of 125 sq.m or more - a pipe diameter of 100mm.
Pipes are fastened to the wall using clamps and pins. To prevent corrosion, the pins must be coated with an anti-corrosion compound or made of galvanized steel.
Gutter selection
In the question of how to properly make a drain, the material from which the elements of the drainage system are made is important. The drainage system can be:
- galvanized;
- galvanized with a polymer layer;
- copper;
- aluminum;
- titanium-zinc;
- plastic.
When choosing a drainage system, consider the following factors:
- type of roof (you must agree that a plastic drain will look ridiculous on an elite building with a copper roof);
- price of system elements;
- complexity of installation;
- resistance to mechanical and temperature influences.
Basic installation rules
Let's assume that you have decided on the type of drain, selected the shape of the elements for it and are ready to start installation.
Before installing the drain, you need to familiarize yourself with the basic installation rules:
- The distance from the pipe to the walls should be 3-8cm. A tight fit will dampen the wall;
- The gutter is always installed with an inclination to the drain so that water does not accumulate and overflow over the top;
- Sealing the joints of the system elements. For example, when assembling the components of a drain, adhesive fastening, cold welding, and rubber seals can be used.
It is difficult to determine which option is better, especially when installing downpipes. After all, each method has its pros and cons:
-
- Rubber seals protect against leaks, tolerate mechanical stress well, but are sensitive to temperature changes;
- Adhesive connection provides reliability to the system, but it cannot be dismantled;
- Cold welding (molecular) provides high strength of the joint, but with linear deformation of the elements leads to their cracking.
As a result, the right to choose the method of attachment is yours.
Gutter installation

Before going into technological subtleties - how to make a drainpipe, let's dwell on the installation sequence:
- Along the perimeter of the roof, the length of the gutter, the number of funnels and pipes are determined;
- The location of the funnel is marked. When installing the dripper, the distance from the funnel opening should be more than 1 cm;
- When the markup is done, hooks (holders) are fixed under gutters for the roof at a distance of 30 cm for a metal system and 60 cm for a plastic one;
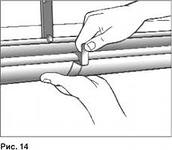
- The installation of the gutters begins with the installation of the funnel, then the gutters are placed in the holder;
- After fixing the gutter with a funnel and holder, they begin to fasten the joints so that the connector element is at the junctions of two gutters;
- Next, the installation of the corners of the drain and pipes is carried out.
Attention. When connecting the gutters, the joints of the two elements should not touch, that is, they must be mounted so that there is a gap between us.
Gutter installation technology
The installation technology of the drainage system includes the following steps:
- Funnel installation. Installation begins with the installation of a water intake funnel if the funnel is fixed directly to the roof on brackets. There are funnels attached to the gutters, then they are installed after the installation of the gutter by mechanical snapping or glue;
- Installation of brackets. As a rule, the distance of the brackets for the gutters is indicated in the instructions for the gutter. The basic rule is to ensure the slope of the gutter. To do this, the extreme bracket is fixed at the highest point of the gutter, a cord is pulled from it to the funnel, along which other brackets are installed. Holders can be mounted on rafter legs (if the roof is not covered) or on a windboard;
Gutter installation
- Gutter installation. Laying starts from the funnel. Sealing of joints is carried out, depending on the type of system, using glue, soldering or connecting elements.On the protruding elements of the facade of the house, corner connecting elements are attached to the gutters. At the ends, the gutter is closed with a side plug;
- Pipe installation. Pipe installation starts from the funnel, away from the wall. Couplings and clamps are used to connect parts of pipes. The gap of fastening to the wall is up to 2 m. If necessary, pipe splitters are included in the system. Between the blind area of the building and the drain element of the downpipe, the distance must be at least 300 mm. When installing a linear drain, the distance can be reduced to 150 mm.
Advice. To cut the plastic elements of the drainage system, you can use a grinder or a hacksaw. When working with metal elements, it is recommended to use metal scissors. The installation of the plastic system is carried out at a positive temperature in order to avoid cracking of the plastic under mechanical stress.
Of course, the gutter device will protect your home and roof from the effects of natural factors. The main thing to understand is that the drain is installed with the expectation of a long service life, so this matter must be approached with responsibility.
Did the article help you?